> ## Documentation Index
> Fetch the complete documentation index at: https://kive.ai/docs/llms.txt
> Use this file to discover all available pages before exploring further.
# AI Studios
> Create scroll-stopping images and videos with studio presets—no advanced prompting required
## Overview
Studios are pre-built environments that blend lighting, camera angles, props and backgrounds to produce professional results without complex prompts. You can remix studios to fit your brand and save them for team use.
## Steps
In the generator, click "STUDIO" in the prompt input to open the list of available studio presets
Choose a studio that fits your brand and style
Drop in a product model or type a short prompt. Keep prompts simple; studios
handle most details
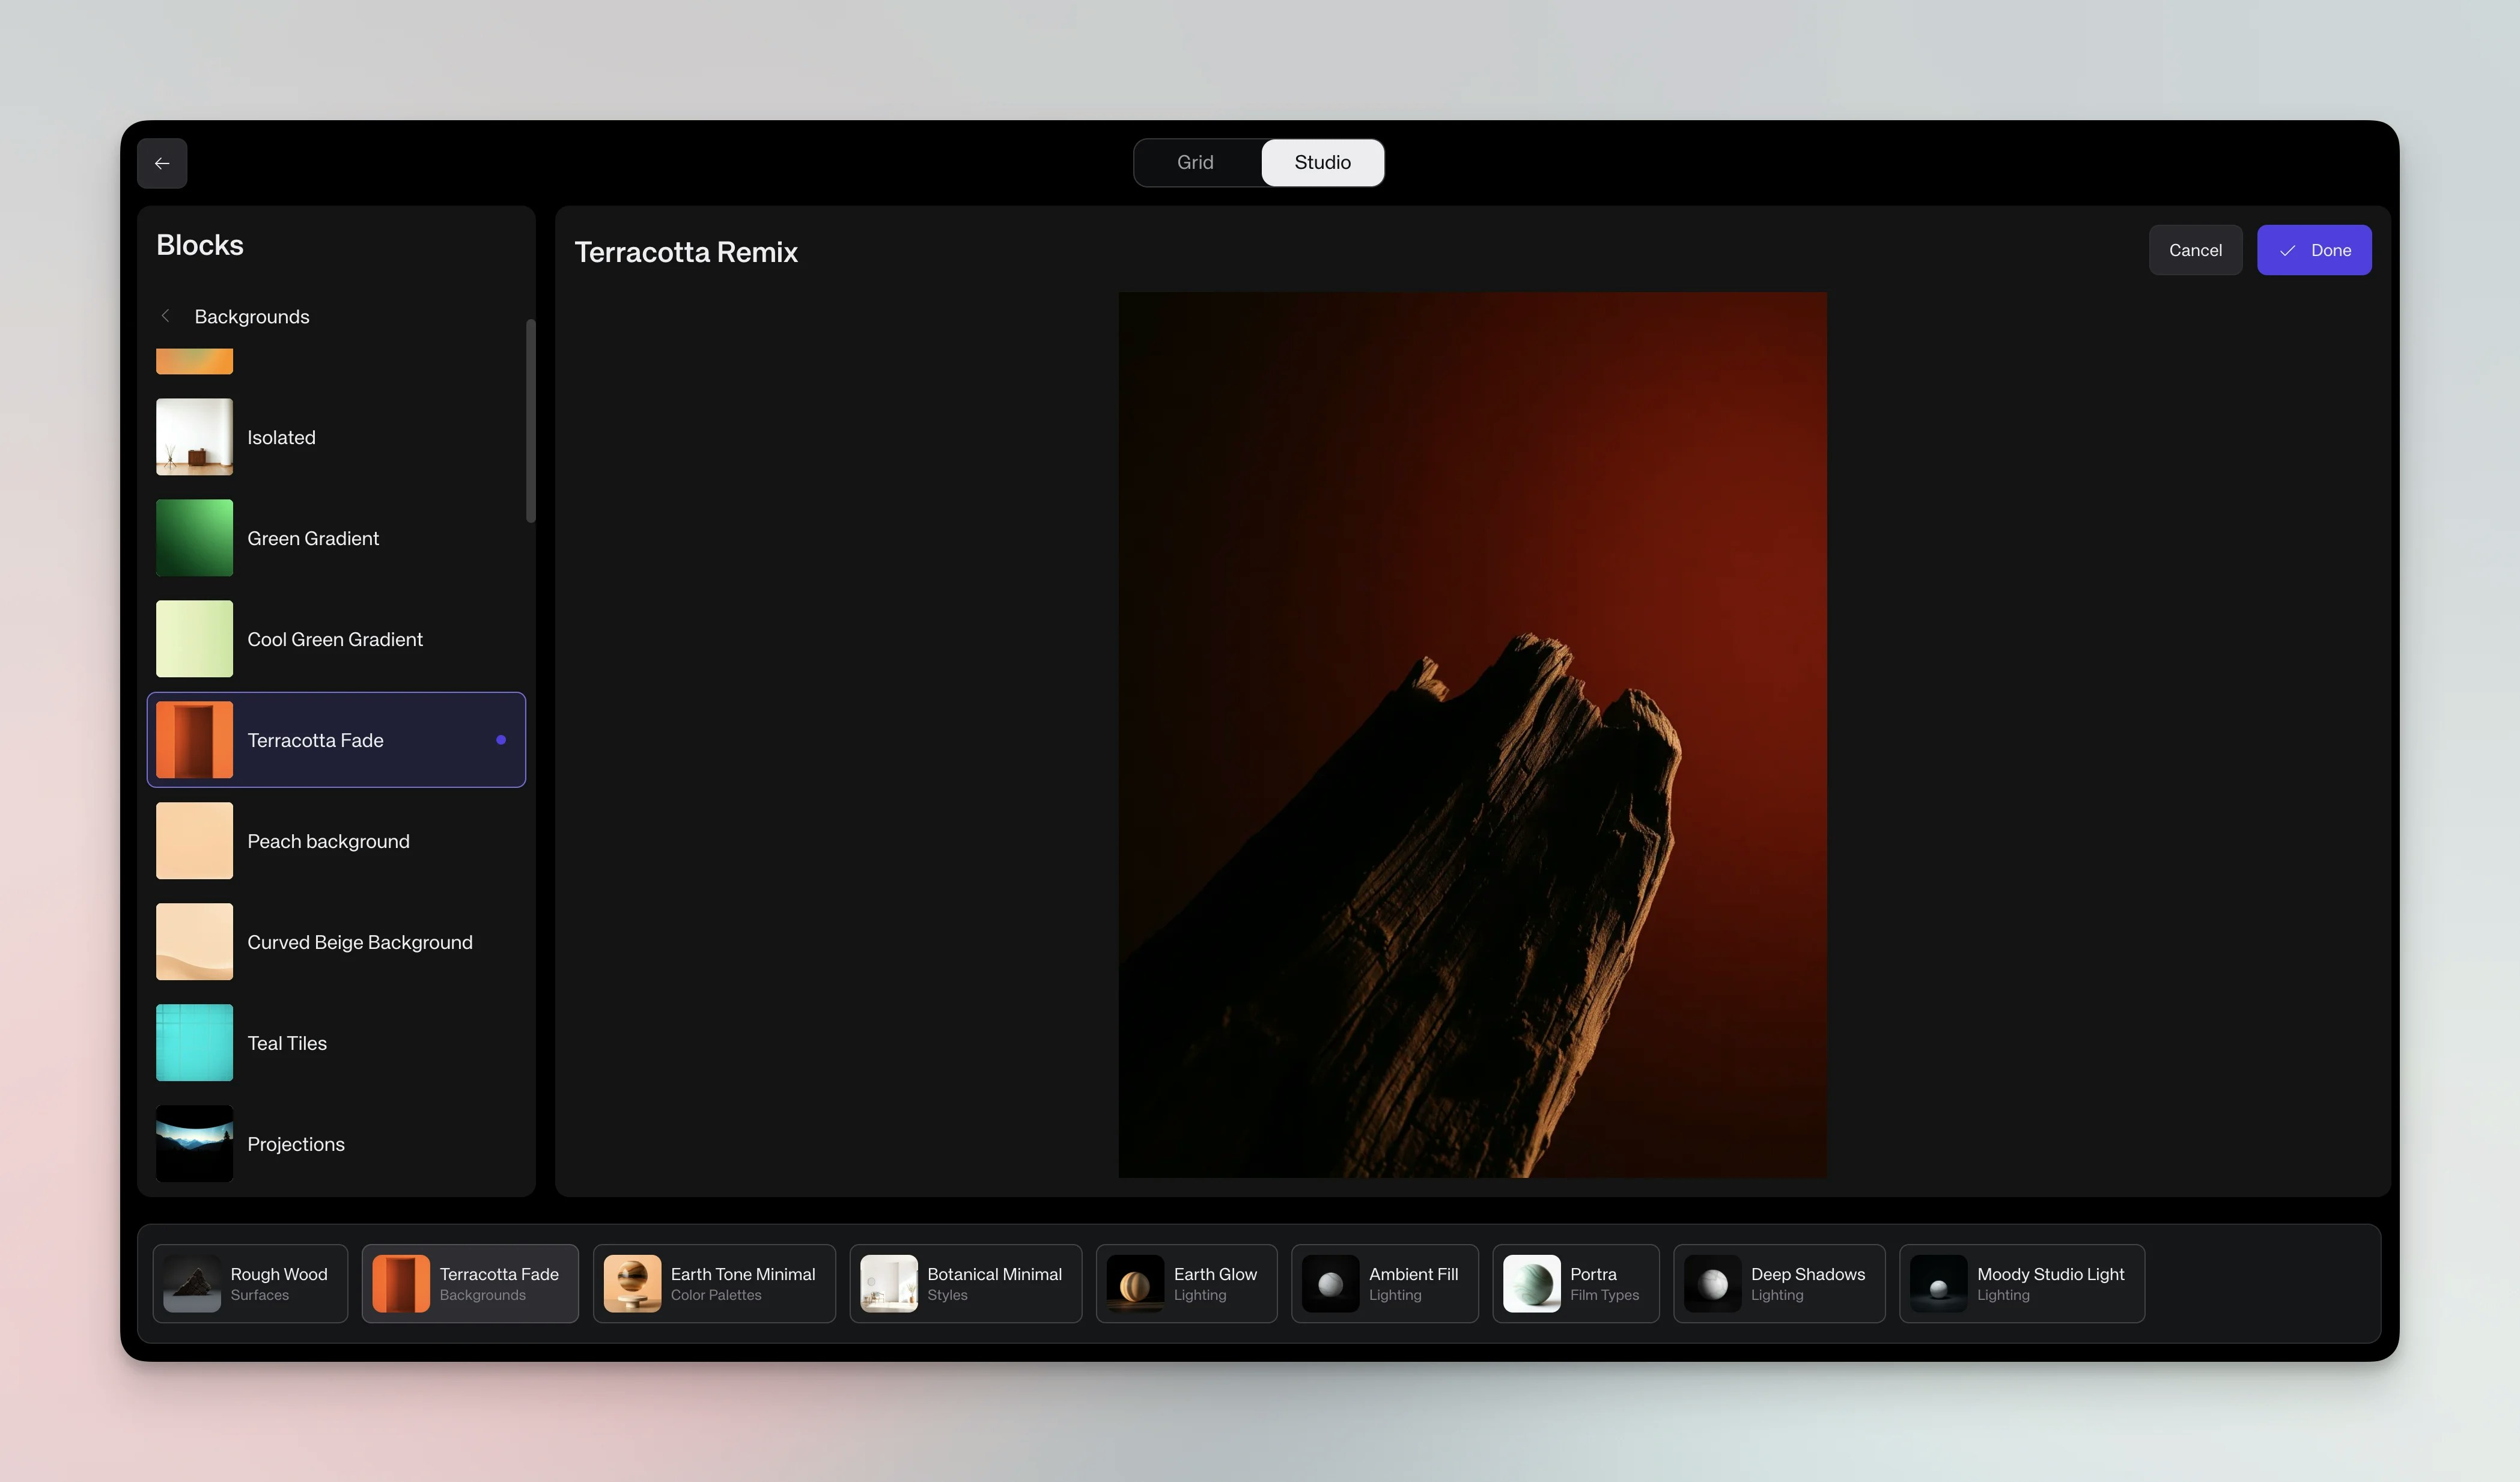
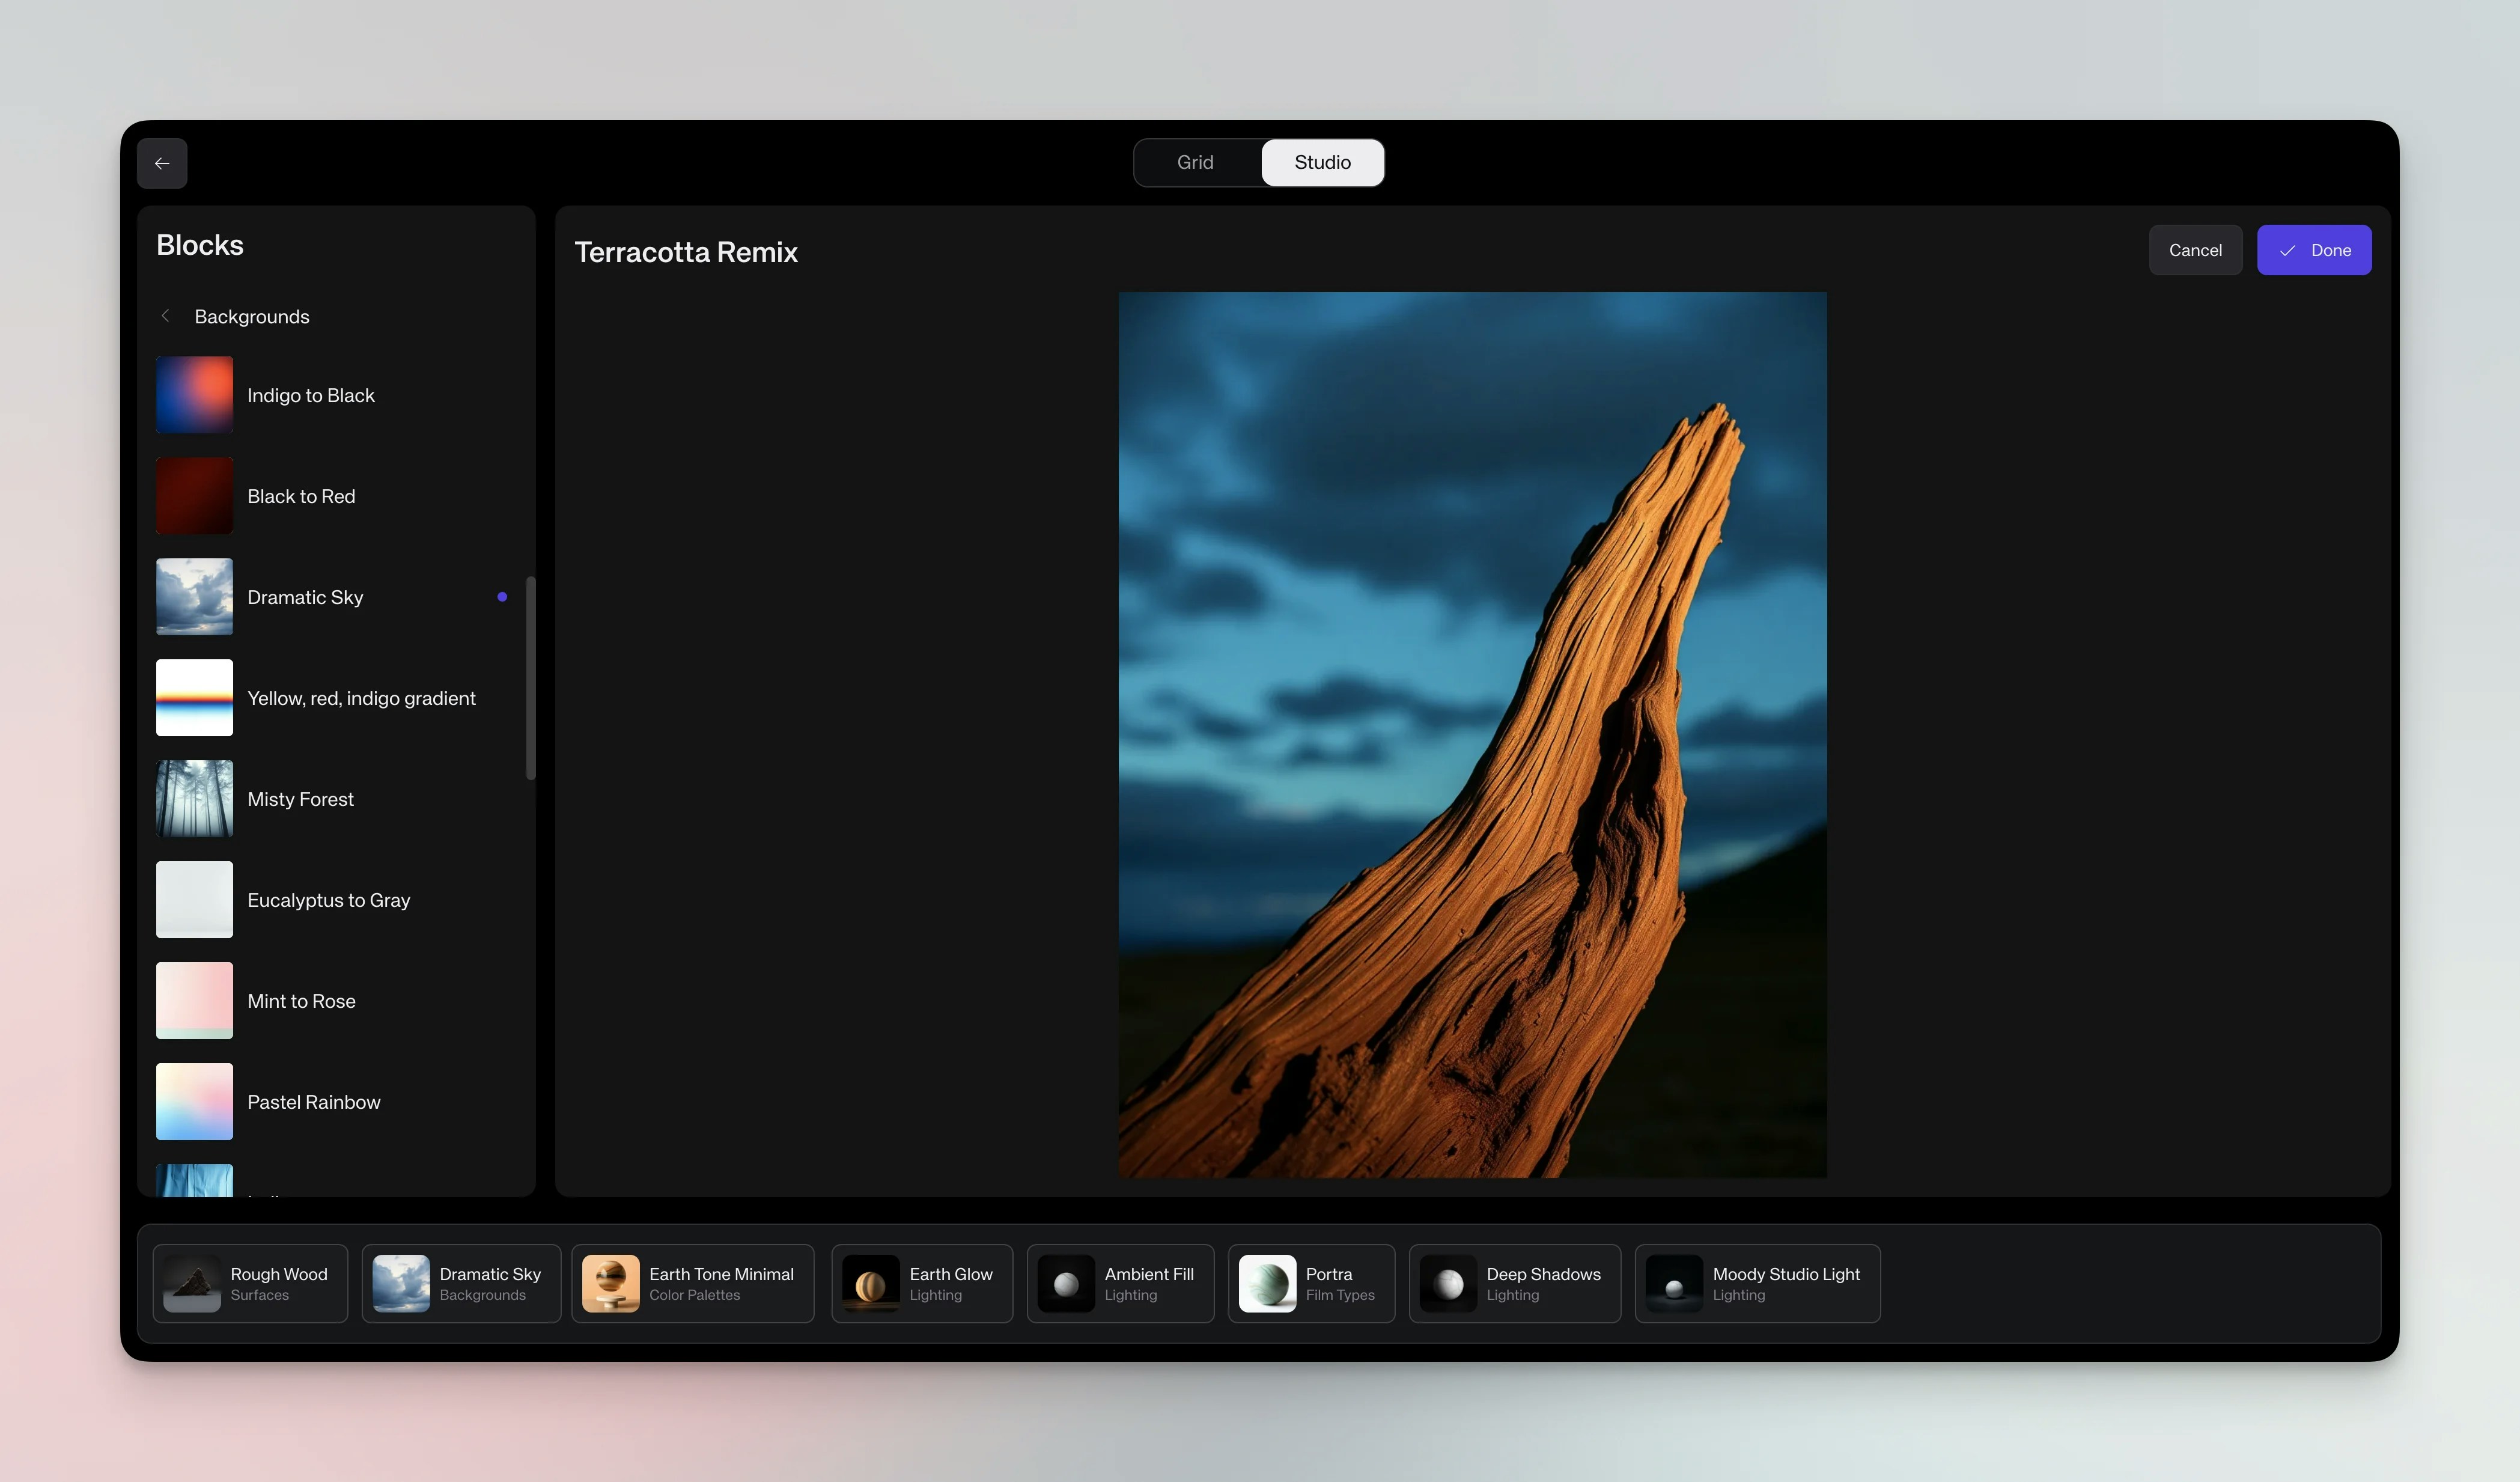
Click Remix to open the Studio editor. Edit blocks such as lighting, camera
angle, props or background. Drag new blocks from categories (props,
lighting, etc.) to customize
After remixing, click Save, name your studio and share it with your
workspace. Saved studios appear alongside presets for future use
## Studio editor concepts
**Blocks:** Studios are made of modular blocks controlling lighting, camera, props and background.
**Editing:** Click a block to replace it; choose options like "golden hour lighting" or "industrial background" to change the mood.
**Adding:** Browse categories and drag additional blocks into the scene (e.g., plants, furniture, textures).
## Generate with studios
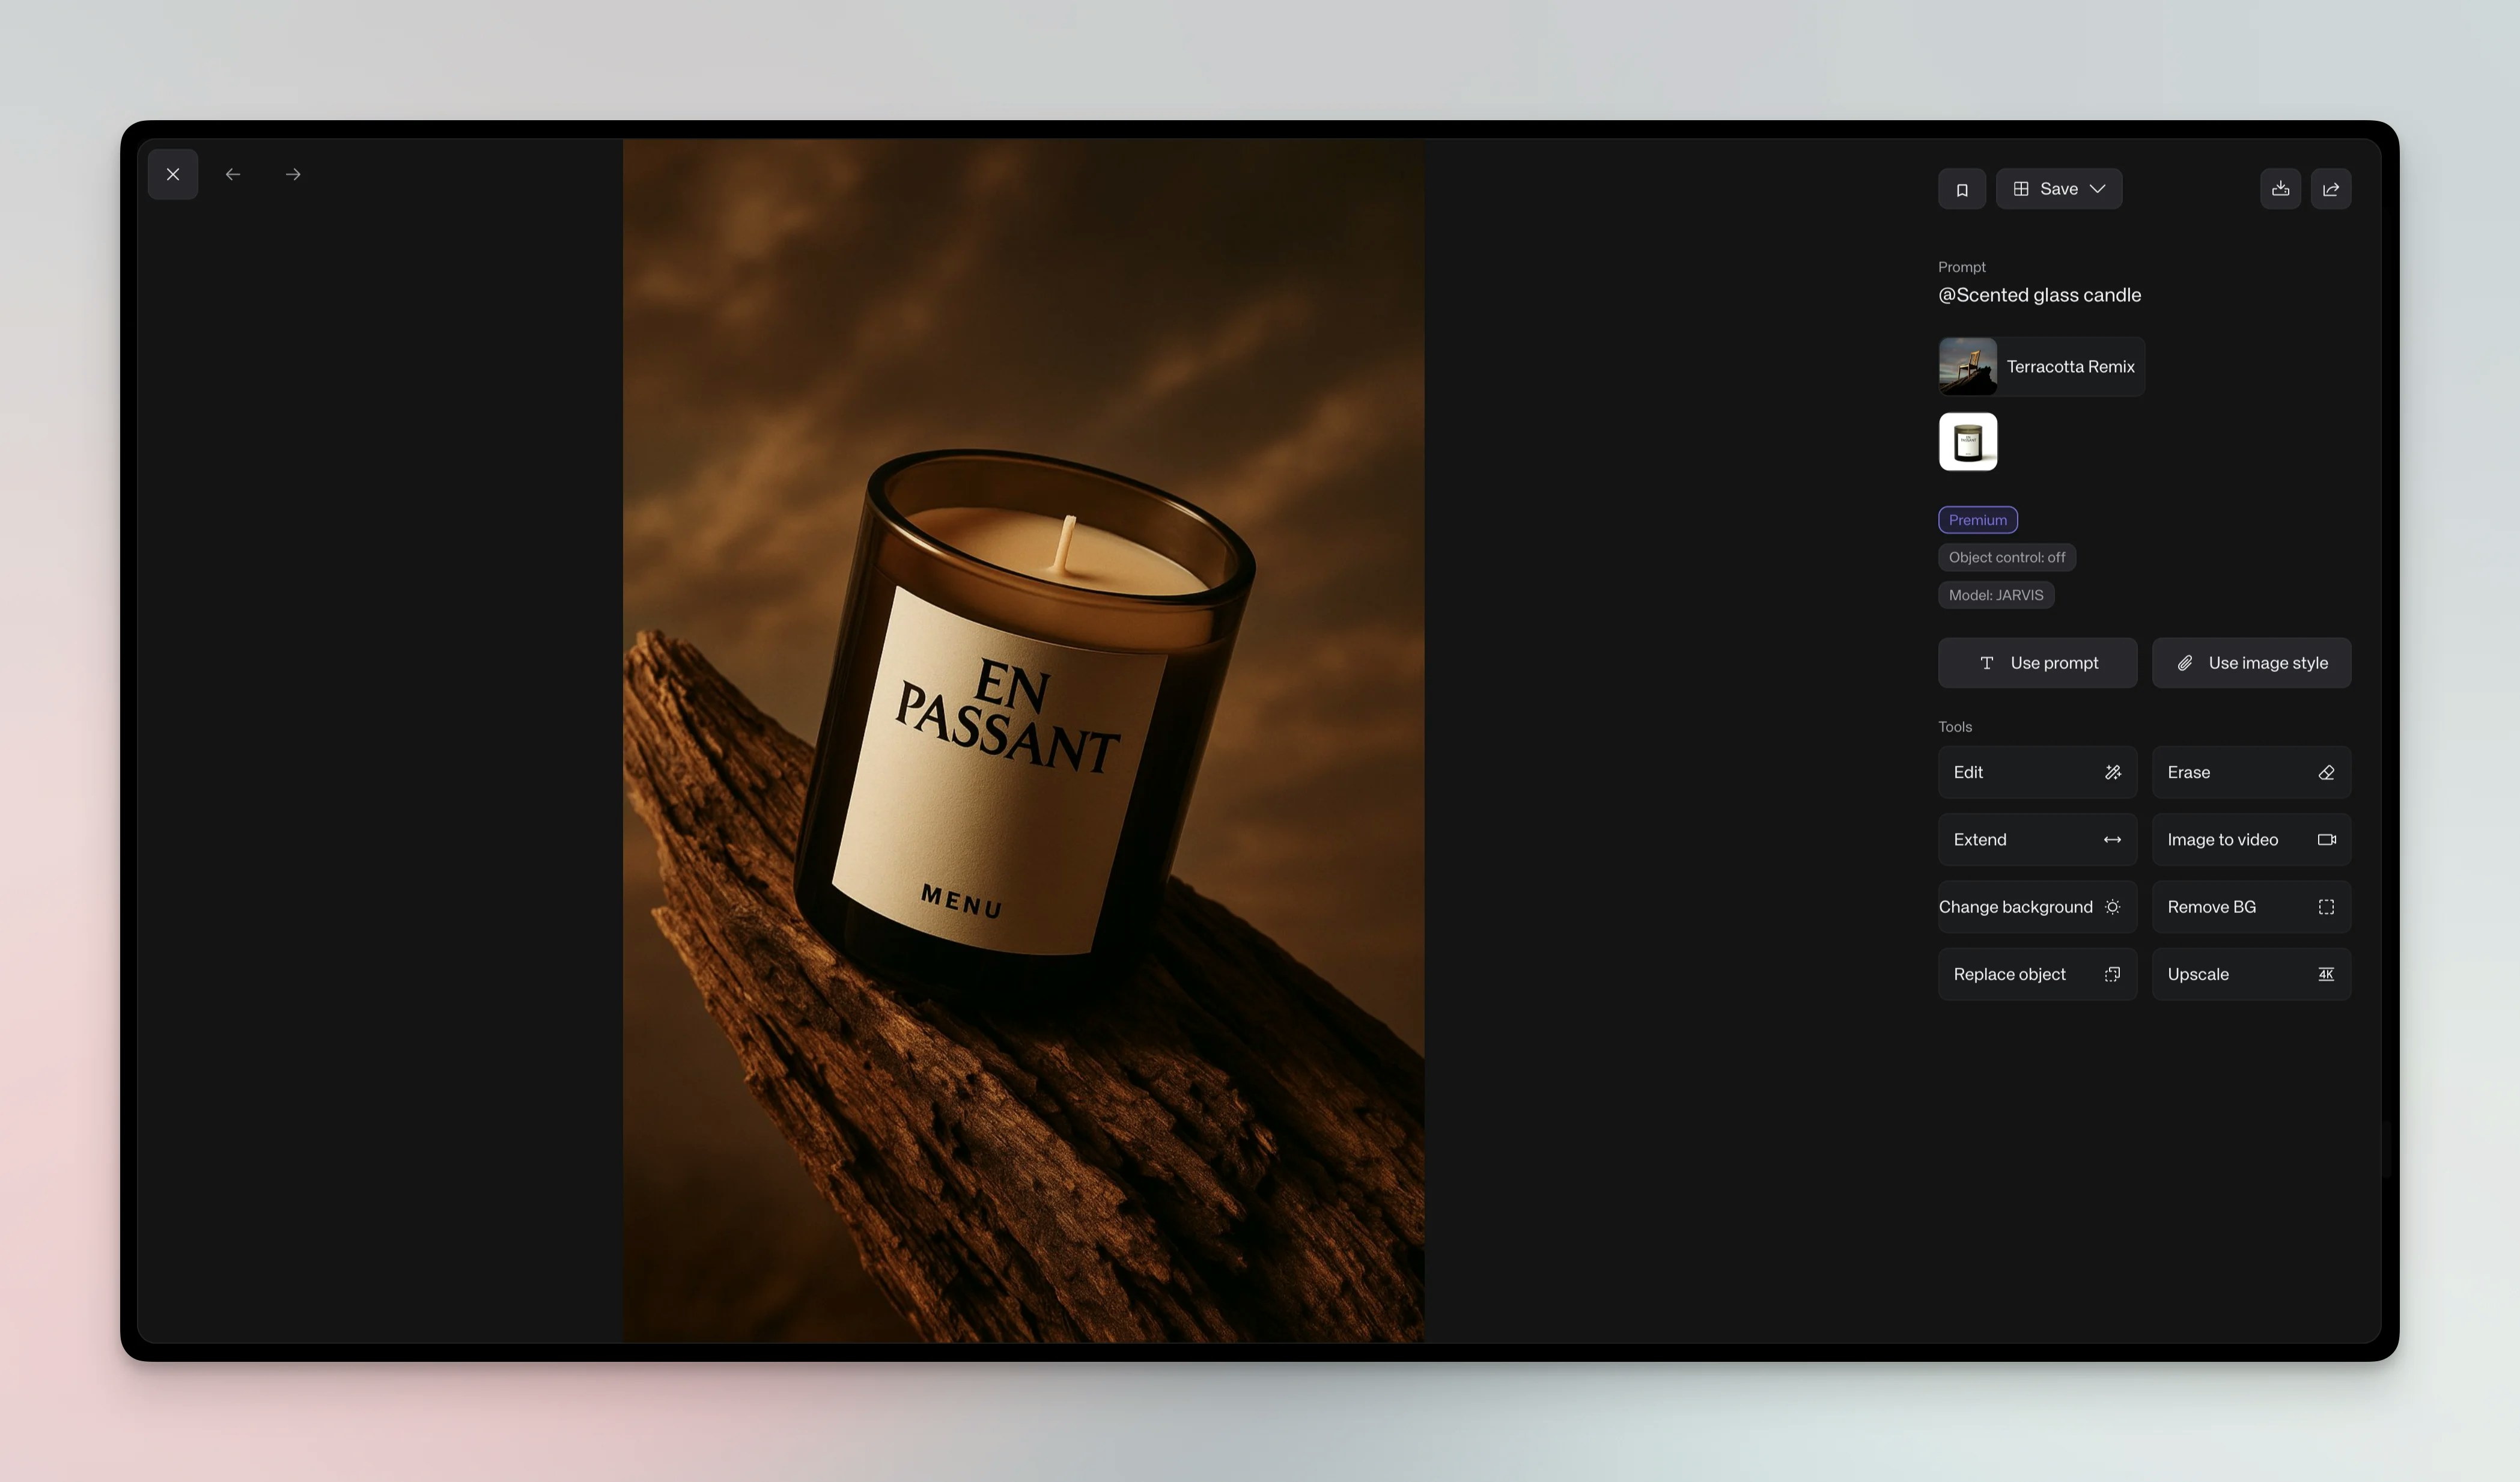
**Images:** Select a studio, add your subject and click Generate. Four variations are produced; save your favorites.
**Browse presets:** From Home or Discover, click a preset to open its detail page. Use the description, examples and **Similar looks** section to compare styles, then click **Use \[preset name]** to load that studio in the generator.
**Videos:** Select a studio, add your subject, switch to video mode, choose camera movement and duration, then generate a single clip.
**Batch generation:** Queue multiple variations across different studios or settings to explore options while the first generation processes.
## Studio categories
**Minimalist:** Clean backgrounds and soft lighting for tech products.
**Natural:** Organic textures and natural lighting for wellness products.
**Dramatic:** Bold lighting and strong shadows for luxury or artistic shots.
**Colorful:** Vibrant backgrounds and playful props for lifestyle brands.
## Collaboration
Saving studios enables your entire team to maintain a consistent visual identity. A typical workflow: creative director designs studios, marketing team uses them for campaigns, social media team ensures consistent aesthetics and product team uses them for on-brand images.
## Advanced techniques
**Studio combinations:** Mix elements from different studios (e.g., luxury lighting with minimalist backgrounds) to create unique environments.
**Seasonal variations:** Build studios for holidays or seasonal collections and reuse them across products and campaigns.
**Brand evolution:** Evolve your brand by remixing studios gradually; save successful variations and phase out old ones.
## Best practices
Use studios for quick, professional results, brand consistency and team collaboration. Consider custom prompting only when you need very specific scenarios or experimental work.
Choose the closest matching studio and remix instead of building from scratch.
Name custom studios clearly so teammates can find them easily.
## Quick reference
| Workflow | Steps |
| --------------- | ------------------------------------------------------------------ |
| Studio workflow | Browse → Select → Add subject → Remix (optional) → Save → Generate |
| Remix workflow | Open editor → Identify changes → Swap blocks → Add elements → Save |
## Troubleshooting
**Studio not saving:** Ensure you've named the studio and have permission to save; try a different name.
**Inconsistent results:** Studios provide consistent style, not identical outputs; generate multiple variations and refine with remix.
**How do I rename a custom studio?** Find the studio preset and hover over it. Click "..." and select **Edit**. Once in the edit screen, you can rename the studio and save your changes.
## Tips
Build a library of custom studios for different seasons, campaigns and clients.
Document which studios work best for specific use cases so your team can follow guidelines.
A/B test the same content in different studios to see which performs better.
Create training materials around your best studios for easier onboarding.
## See also
* [Create professional AI product shots](/guides/ai-product-shots)
* [Create consistent AI character models](/guides/ai-character-models)
* [Create AI videos with synchronized sound](/guides/ai-videos-with-sound)
 **Browse presets:** From Home or Discover, click a preset to open its detail page. Use the description, examples and **Similar looks** section to compare styles, then click **Use \[preset name]** to load that studio in the generator.
**Videos:** Select a studio, add your subject, switch to video mode, choose camera movement and duration, then generate a single clip.
**Batch generation:** Queue multiple variations across different studios or settings to explore options while the first generation processes.
## Studio categories
**Minimalist:** Clean backgrounds and soft lighting for tech products.
**Natural:** Organic textures and natural lighting for wellness products.
**Dramatic:** Bold lighting and strong shadows for luxury or artistic shots.
**Colorful:** Vibrant backgrounds and playful props for lifestyle brands.
## Collaboration
Saving studios enables your entire team to maintain a consistent visual identity. A typical workflow: creative director designs studios, marketing team uses them for campaigns, social media team ensures consistent aesthetics and product team uses them for on-brand images.
## Advanced techniques
**Studio combinations:** Mix elements from different studios (e.g., luxury lighting with minimalist backgrounds) to create unique environments.
**Seasonal variations:** Build studios for holidays or seasonal collections and reuse them across products and campaigns.
**Brand evolution:** Evolve your brand by remixing studios gradually; save successful variations and phase out old ones.
## Best practices
Use studios for quick, professional results, brand consistency and team collaboration. Consider custom prompting only when you need very specific scenarios or experimental work.
Choose the closest matching studio and remix instead of building from scratch.
Name custom studios clearly so teammates can find them easily.
## Quick reference
| Workflow | Steps |
| --------------- | ------------------------------------------------------------------ |
| Studio workflow | Browse → Select → Add subject → Remix (optional) → Save → Generate |
| Remix workflow | Open editor → Identify changes → Swap blocks → Add elements → Save |
## Troubleshooting
**Studio not saving:** Ensure you've named the studio and have permission to save; try a different name.
**Inconsistent results:** Studios provide consistent style, not identical outputs; generate multiple variations and refine with remix.
**How do I rename a custom studio?** Find the studio preset and hover over it. Click "..." and select **Edit**. Once in the edit screen, you can rename the studio and save your changes.
## Tips
Build a library of custom studios for different seasons, campaigns and clients.
Document which studios work best for specific use cases so your team can follow guidelines.
A/B test the same content in different studios to see which performs better.
Create training materials around your best studios for easier onboarding.
## See also
* [Create professional AI product shots](/guides/ai-product-shots)
* [Create consistent AI character models](/guides/ai-character-models)
* [Create AI videos with synchronized sound](/guides/ai-videos-with-sound)
**Browse presets:** From Home or Discover, click a preset to open its detail page. Use the description, examples and **Similar looks** section to compare styles, then click **Use \[preset name]** to load that studio in the generator.
**Videos:** Select a studio, add your subject, switch to video mode, choose camera movement and duration, then generate a single clip.
**Batch generation:** Queue multiple variations across different studios or settings to explore options while the first generation processes.
## Studio categories
**Minimalist:** Clean backgrounds and soft lighting for tech products.
**Natural:** Organic textures and natural lighting for wellness products.
**Dramatic:** Bold lighting and strong shadows for luxury or artistic shots.
**Colorful:** Vibrant backgrounds and playful props for lifestyle brands.
## Collaboration
Saving studios enables your entire team to maintain a consistent visual identity. A typical workflow: creative director designs studios, marketing team uses them for campaigns, social media team ensures consistent aesthetics and product team uses them for on-brand images.
## Advanced techniques
**Studio combinations:** Mix elements from different studios (e.g., luxury lighting with minimalist backgrounds) to create unique environments.
**Seasonal variations:** Build studios for holidays or seasonal collections and reuse them across products and campaigns.
**Brand evolution:** Evolve your brand by remixing studios gradually; save successful variations and phase out old ones.
## Best practices
Use studios for quick, professional results, brand consistency and team collaboration. Consider custom prompting only when you need very specific scenarios or experimental work.
Choose the closest matching studio and remix instead of building from scratch.
Name custom studios clearly so teammates can find them easily.
## Quick reference
| Workflow | Steps |
| --------------- | ------------------------------------------------------------------ |
| Studio workflow | Browse → Select → Add subject → Remix (optional) → Save → Generate |
| Remix workflow | Open editor → Identify changes → Swap blocks → Add elements → Save |
## Troubleshooting
**Studio not saving:** Ensure you've named the studio and have permission to save; try a different name.
**Inconsistent results:** Studios provide consistent style, not identical outputs; generate multiple variations and refine with remix.
**How do I rename a custom studio?** Find the studio preset and hover over it. Click "..." and select **Edit**. Once in the edit screen, you can rename the studio and save your changes.
## Tips
Build a library of custom studios for different seasons, campaigns and clients.
Document which studios work best for specific use cases so your team can follow guidelines.
A/B test the same content in different studios to see which performs better.
Create training materials around your best studios for easier onboarding.
## See also
* [Create professional AI product shots](/guides/ai-product-shots)
* [Create consistent AI character models](/guides/ai-character-models)
* [Create AI videos with synchronized sound](/guides/ai-videos-with-sound)