> ## Documentation Index
> Fetch the complete documentation index at: https://kive.ai/docs/llms.txt
> Use this file to discover all available pages before exploring further.
# Train a custom model
> Train custom models from your own photos to reuse specific subjects across generations
## Overview
AI models let you reuse a specific product, character, or style across many generations. Train a model once with your photos, then reference it in prompts with `@modelname`.
**Note:** If you just need to show people in your images (like "male model in athletic wear" or "woman with long brown hair"), you can describe them directly in your prompt without creating a character model. Character models are only needed when you want the exact same specific person to appear consistently across multiple generations.
For character models, use photos of the same person to ensure consistency. For product models, use photos of the same product from different angles.
Free users can access demo models. Product and Character models are available on all paid plans (Basic, Pro and Enterprise). Style models are only available on Pro and Enterprise.
## Demo models
 All plans include demo models like Acme Serum, Poppy Flowers Vase, Black Loafer, and Sunny Forest Portrait. Click **Try model** on the **Models** page and generate images from the associated studio.
## Train a custom model
Creating a new model adds it to your workspace alongside your existing models. To modify an existing model instead, see [Edit an existing model](#edit-an-existing-model).
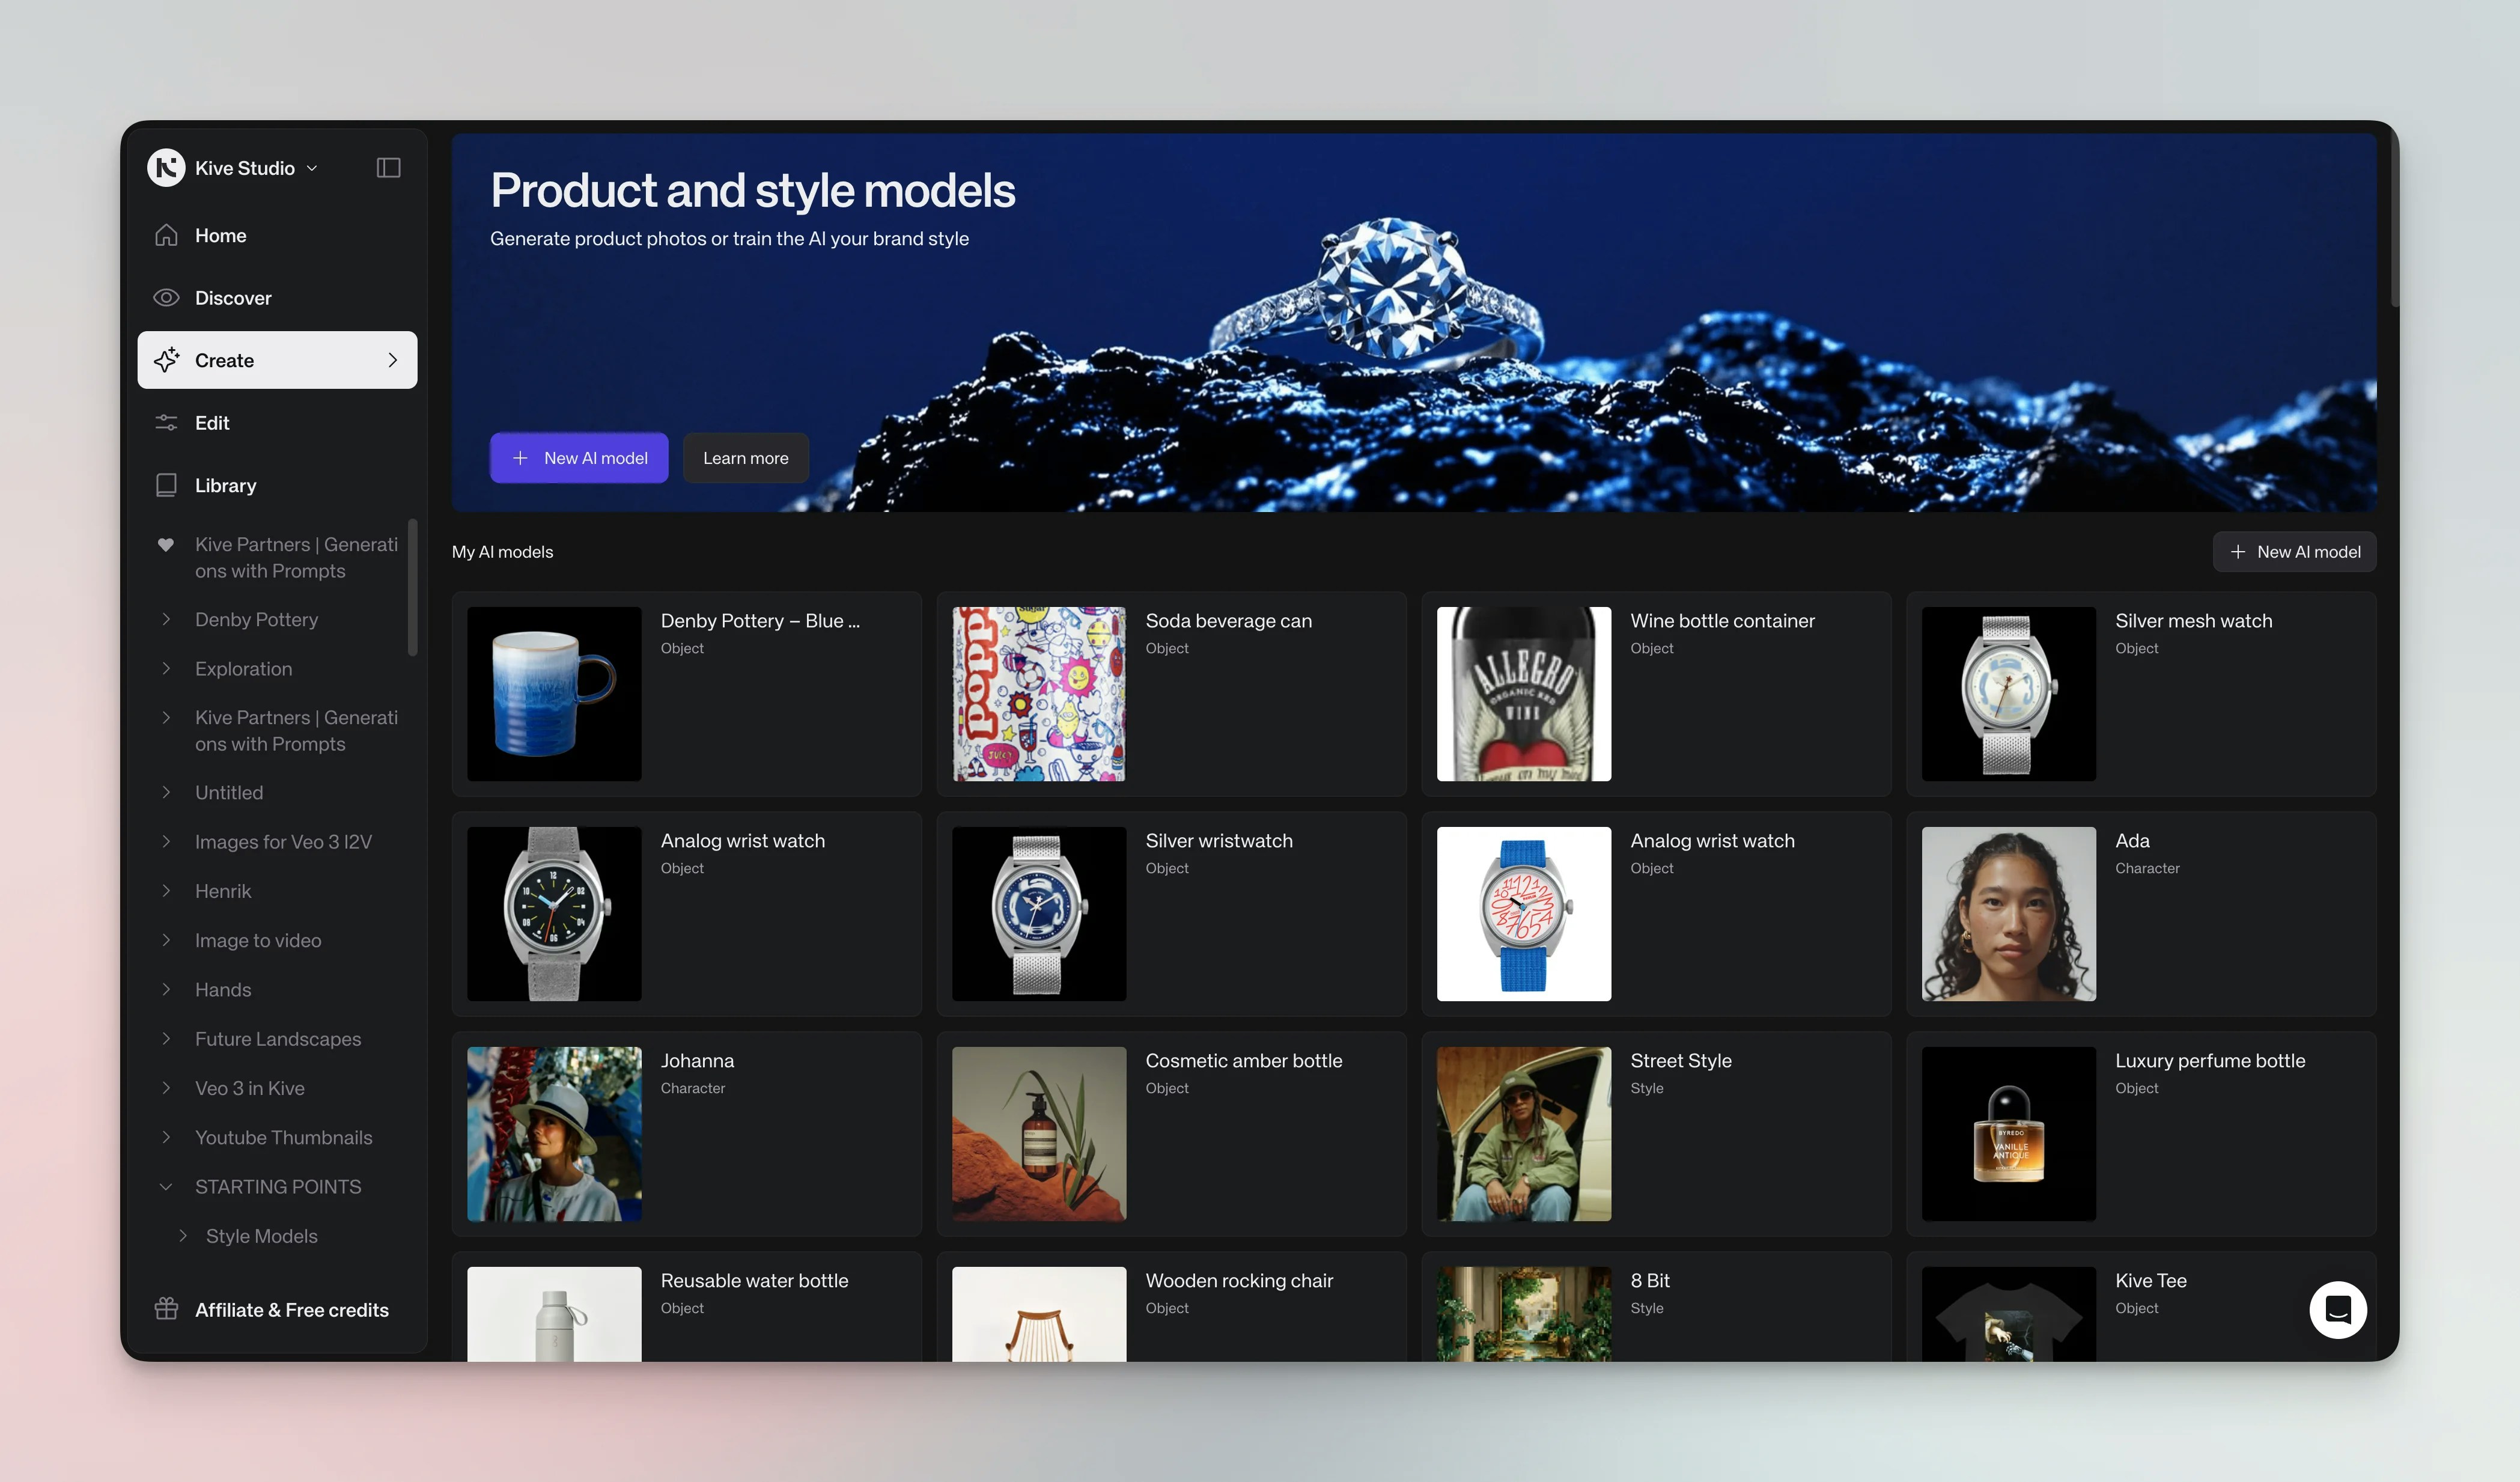
In **Organize**, open **AI models** from the left side menu (or go directly to `/organize/ai-models`), then click **Create model**.
The Home dashboard's **Create a product shot** and **Create a custom style** quick actions open the training modal directly — handy alternate entry points when you just want to create a new model. Managing, editing, or deleting existing models still happens under **Organize → AI models**.
Choose **Product**, **Character**, or **Style**. Product and Character models are
available on all paid plans (Basic, Pro and Enterprise). Style
models are available on Pro and Enterprise only.
All plans include demo models like Acme Serum, Poppy Flowers Vase, Black Loafer, and Sunny Forest Portrait. Click **Try model** on the **Models** page and generate images from the associated studio.
## Train a custom model
Creating a new model adds it to your workspace alongside your existing models. To modify an existing model instead, see [Edit an existing model](#edit-an-existing-model).
In **Organize**, open **AI models** from the left side menu (or go directly to `/organize/ai-models`), then click **Create model**.
The Home dashboard's **Create a product shot** and **Create a custom style** quick actions open the training modal directly — handy alternate entry points when you just want to create a new model. Managing, editing, or deleting existing models still happens under **Organize → AI models**.
Choose **Product**, **Character**, or **Style**. Product and Character models are
available on all paid plans (Basic, Pro and Enterprise). Style
models are available on Pro and Enterprise only.  Provide images of your subject (1–4 for Product, 1–3 for Character, or 5–40 for Style) using any of these methods:
* **Upload from your device** — Select images from your computer
* **Pick from library** — Choose existing images from your Kive library
* **Import from URL** — Paste a product URL to automatically import product from your online store
Product models are created one at a time. Use the "Import from URL" feature for each product individually. This is different from uploading images to your library, which supports bulk uploads.
Give it a memorable name (for example, Ada or Summer Shoes)
Provide images of your subject (1–4 for Product, 1–3 for Character, or 5–40 for Style) using any of these methods:
* **Upload from your device** — Select images from your computer
* **Pick from library** — Choose existing images from your Kive library
* **Import from URL** — Paste a product URL to automatically import product from your online store
Product models are created one at a time. Use the "Import from URL" feature for each product individually. This is different from uploading images to your library, which supports bulk uploads.
Give it a memorable name (for example, Ada or Summer Shoes) 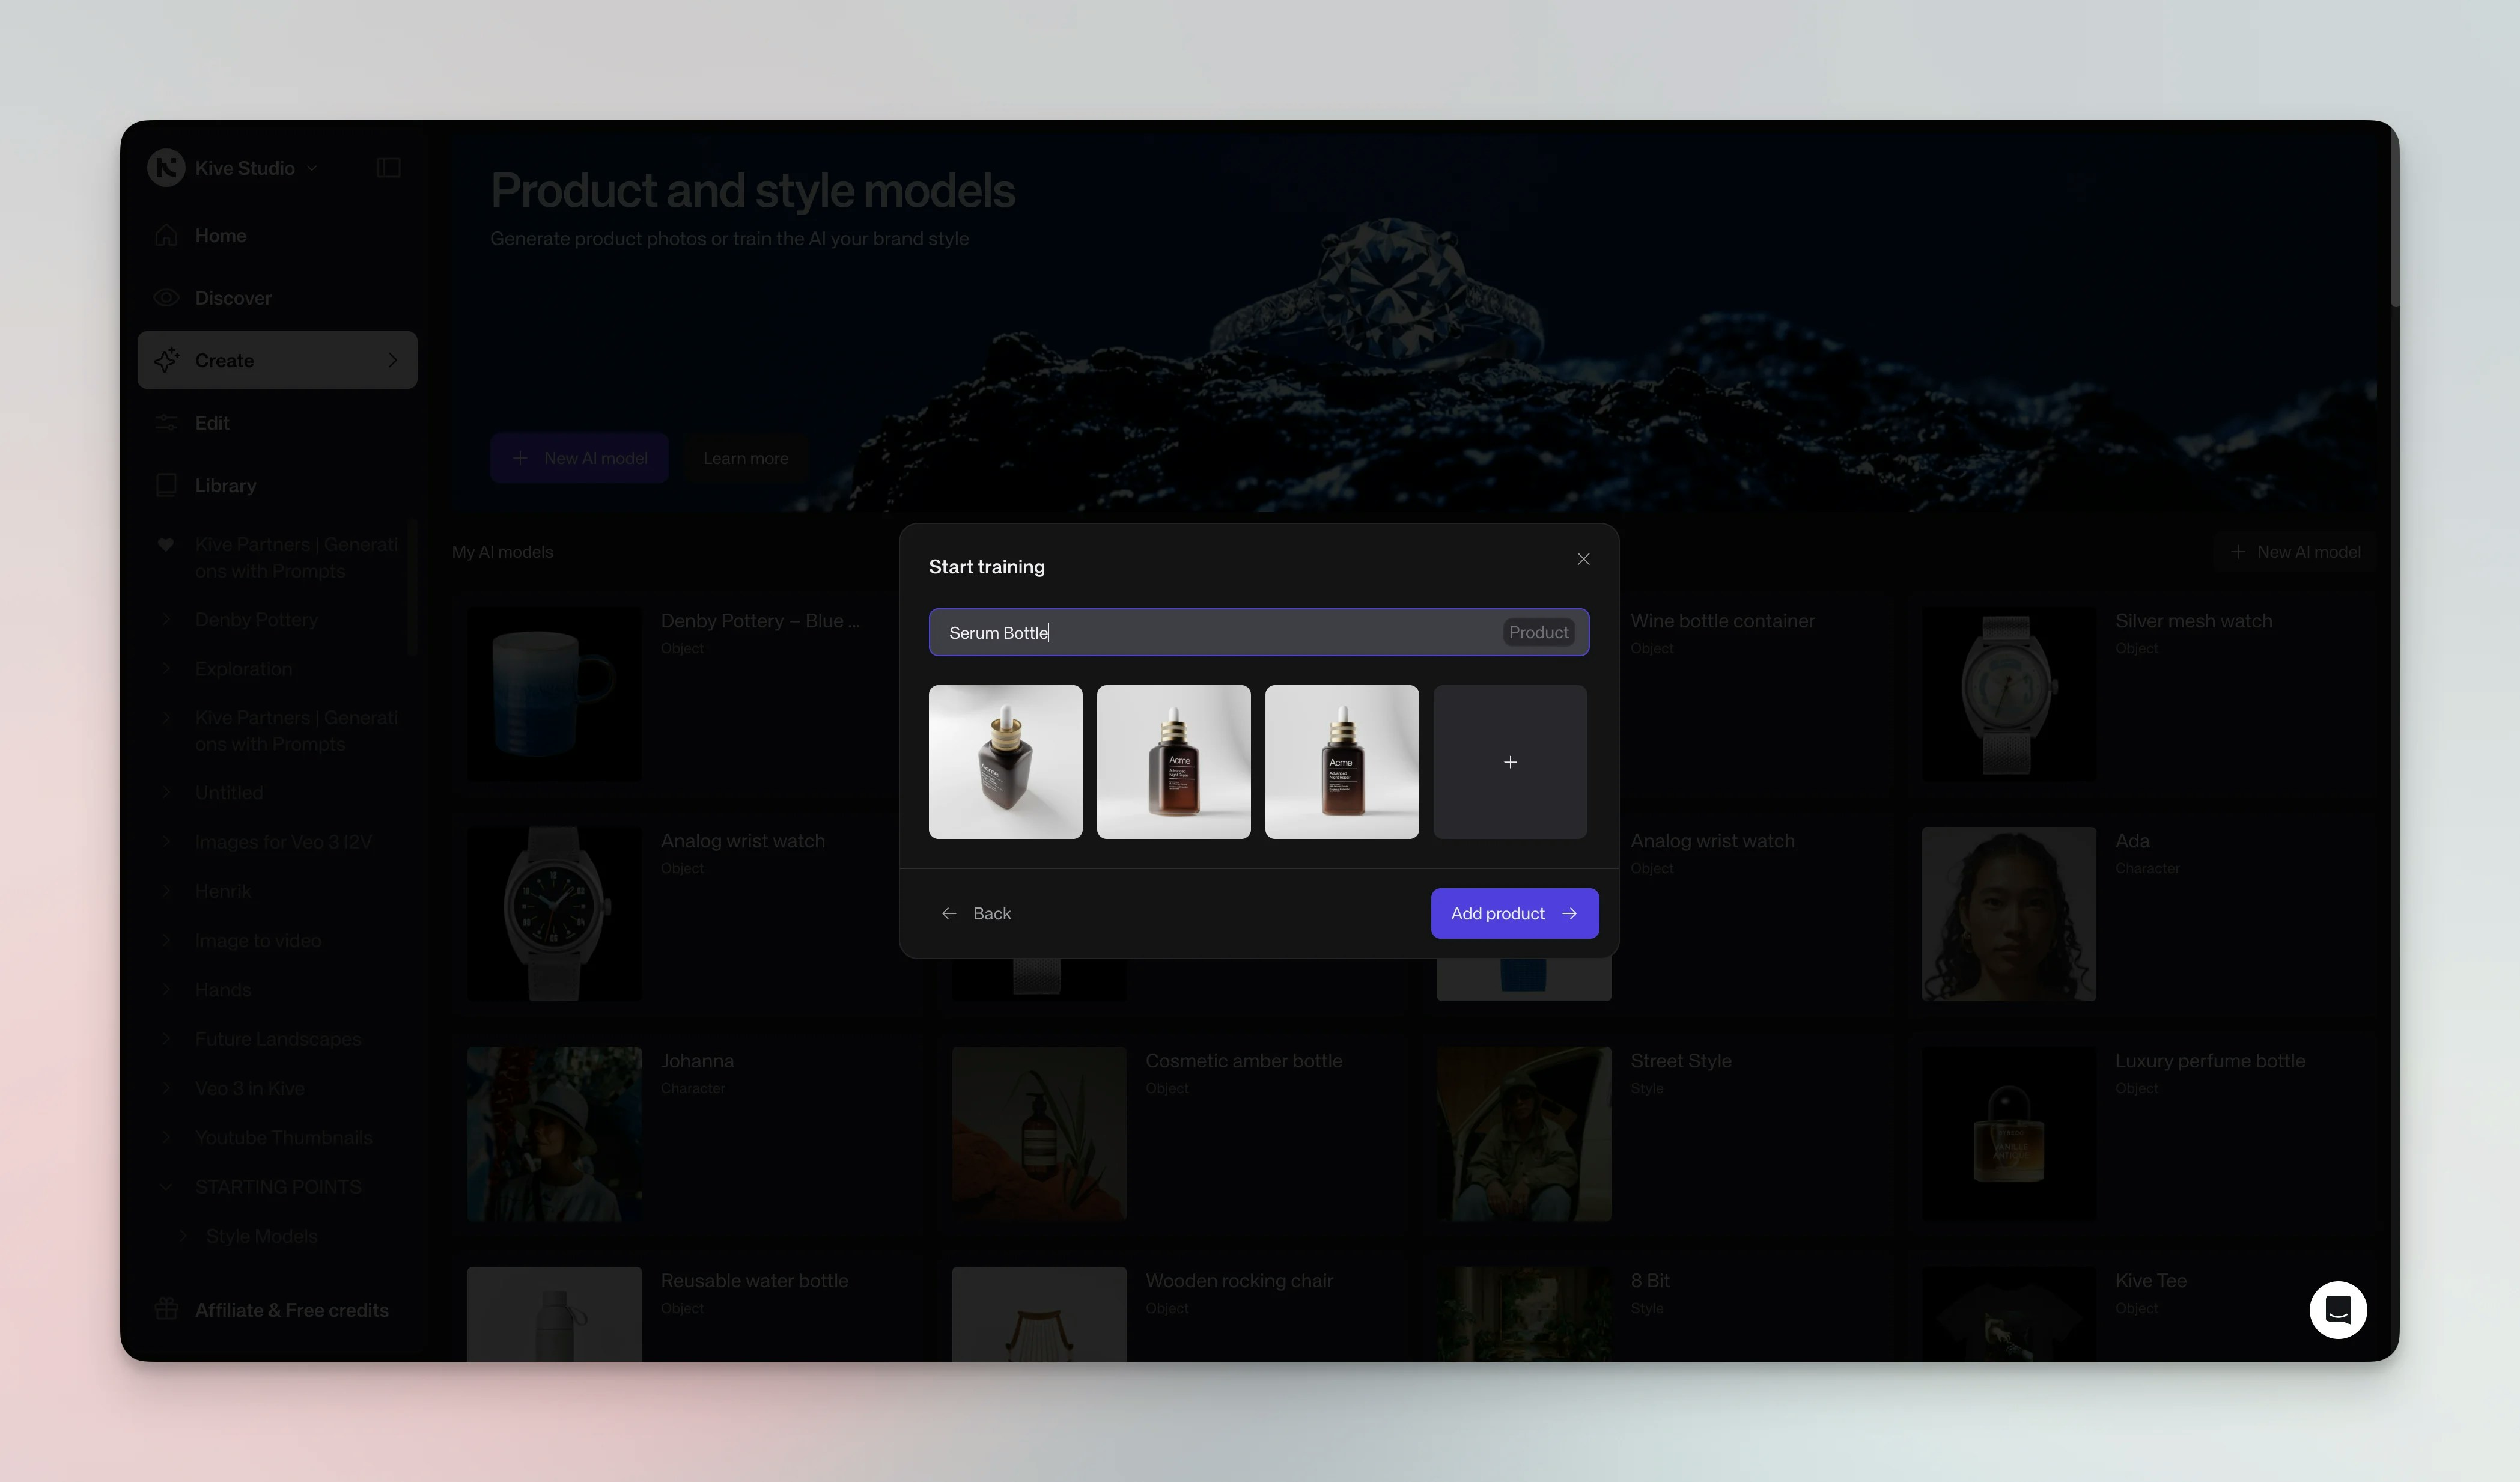 Click **Create model** to start training
## Review image feedback
Before you train, Kive automatically checks your input images and flags potential
problems — so you can fix them up front instead of spending generation credits on
a model that produces inconsistent results.
While images are being checked you'll see an **Analyzing images** status. If any
problems are found, a **Fix issues** badge appears.
Common flags include:
* **Low resolution** — small images give the model less detail to learn from, so
generations look soft or lose fine features. Use at least 512×512px.
* **Blurry or illegible details** — if text or logos aren't sharp in your inputs,
the model can't reproduce them and tends to invent garbled versions.
* **Different subject** — when one image shows a different product or person than
the rest, the model blends them together and your subject comes out inconsistent.
* **Background clutter** — a busy background competes for attention, so the model
may bake unwanted background elements into your subject.
* **Unclear product** — if the AI can't confidently tell what the product is, it
may get its shape or category wrong in generations.
* **Unknown size** — without a sense of real-world scale, generations can render
the product too large or too small for the scene
(see [Product sizing for accessories](#best-practices)).
Feedback is advisory. You can dismiss any warning and create the model anyway —
but resolving flagged issues up front saves credits and produces more consistent
generations.
### Best practices
**Training:** Use sharp, high-resolution photos with consistent lighting. Avoid noisy backgrounds or extreme angles.
**Character models:** Always use photos of the same person. Character models are designed to recreate one specific individual consistently across generations.
**Image quality matters:** One great image is better than one great image plus two poor-quality images. Poor images can dilute the model's accuracy and lead to inconsistent results.
**Fixing product detail issues:** If the AI is changing your product details (logos, buttons, colors) significantly:
1. Go to **AI models** → hover the model → **Edit** to change the input images
2. Use a single high-quality photo showing the product from its best angle
3. For apparel with different front/back prints, create **separate models** for each view
4. Add specific prompt instructions like "maintain exact logo" or "keep original button placement"
**Angle optimization:** For highest product accuracy across different angles, create multiple product models — each optimized for a specific angle (front view, back view, top view). This gives you more control and better consistency than training one model with all angles.
**Naming:** Choose unique, descriptive names; avoid spaces or special characters.
**Testing:** Generate several images to confirm the model captures your subject. If results aren't consistent, add more photos or retrain.
**Product shots:** For e‑commerce, train product models once and reuse them in product‑shot studios for fast, consistent marketing images.
**Product sizing for accessories:** When training models for jewellery, accessories, or bags, include at least one image showing the product worn or held by a person to help the AI understand scale. For necklaces, use a faceless image with the necklace worn on a person's neck. For bags, show them slung over a shoulder or held in a hand. For rings, include a close-up on a finger. This context dramatically improves size accuracy in generated images.
## Edit an existing model
To modify or retrain an existing model with new or additional images:
In **Organize**, open **AI models** from the left side menu (`/organize/ai-models`)
Hover over the model you want to edit and click **Edit**
Add new images or remove existing ones using the same upload methods (device, library, or URL)
Click **Save** to retrain the model with the updated images
Editing a model updates the existing model. It does not create a new one. All future generations using `@modelname` will use the updated version.
## Delete a model
To remove a model you no longer need:
1. Go to **AI models**
2. Hover over the model you want to delete
3. Click the **…** (three dots) menu
4. Select **Delete**
Deleting a model is permanent and cannot be undone. Any prompts referencing the deleted model will no longer work.
## Use models in prompts
Reference the model in any prompt by typing `@modelname`. Example: `@ada wearing a business suit in an office`.
**Multi-product shots**: Combine multiple product or character models in a single image by tagging them with commas: `@product1, @product2, @product3` or `@character1, @character2`. Perfect for creating scenes with multiple trained products or characters together.
Use studios and style references alongside product and character models to keep style and context consistent.
You can mix one style model with product and/or character models in the same prompt for layered control. Only one style model is allowed per prompt, and a style model still cannot be combined with a separate style reference image (use one or the other).
## See also
* [Create consistent AI character models](/guides/ai-character-models)
* [Create professional AI product shots](/guides/ai-product-shots)
* [Master AI studios for production-grade visuals](/guides/ai-studios)
Click **Create model** to start training
## Review image feedback
Before you train, Kive automatically checks your input images and flags potential
problems — so you can fix them up front instead of spending generation credits on
a model that produces inconsistent results.
While images are being checked you'll see an **Analyzing images** status. If any
problems are found, a **Fix issues** badge appears.
Common flags include:
* **Low resolution** — small images give the model less detail to learn from, so
generations look soft or lose fine features. Use at least 512×512px.
* **Blurry or illegible details** — if text or logos aren't sharp in your inputs,
the model can't reproduce them and tends to invent garbled versions.
* **Different subject** — when one image shows a different product or person than
the rest, the model blends them together and your subject comes out inconsistent.
* **Background clutter** — a busy background competes for attention, so the model
may bake unwanted background elements into your subject.
* **Unclear product** — if the AI can't confidently tell what the product is, it
may get its shape or category wrong in generations.
* **Unknown size** — without a sense of real-world scale, generations can render
the product too large or too small for the scene
(see [Product sizing for accessories](#best-practices)).
Feedback is advisory. You can dismiss any warning and create the model anyway —
but resolving flagged issues up front saves credits and produces more consistent
generations.
### Best practices
**Training:** Use sharp, high-resolution photos with consistent lighting. Avoid noisy backgrounds or extreme angles.
**Character models:** Always use photos of the same person. Character models are designed to recreate one specific individual consistently across generations.
**Image quality matters:** One great image is better than one great image plus two poor-quality images. Poor images can dilute the model's accuracy and lead to inconsistent results.
**Fixing product detail issues:** If the AI is changing your product details (logos, buttons, colors) significantly:
1. Go to **AI models** → hover the model → **Edit** to change the input images
2. Use a single high-quality photo showing the product from its best angle
3. For apparel with different front/back prints, create **separate models** for each view
4. Add specific prompt instructions like "maintain exact logo" or "keep original button placement"
**Angle optimization:** For highest product accuracy across different angles, create multiple product models — each optimized for a specific angle (front view, back view, top view). This gives you more control and better consistency than training one model with all angles.
**Naming:** Choose unique, descriptive names; avoid spaces or special characters.
**Testing:** Generate several images to confirm the model captures your subject. If results aren't consistent, add more photos or retrain.
**Product shots:** For e‑commerce, train product models once and reuse them in product‑shot studios for fast, consistent marketing images.
**Product sizing for accessories:** When training models for jewellery, accessories, or bags, include at least one image showing the product worn or held by a person to help the AI understand scale. For necklaces, use a faceless image with the necklace worn on a person's neck. For bags, show them slung over a shoulder or held in a hand. For rings, include a close-up on a finger. This context dramatically improves size accuracy in generated images.
## Edit an existing model
To modify or retrain an existing model with new or additional images:
In **Organize**, open **AI models** from the left side menu (`/organize/ai-models`)
Hover over the model you want to edit and click **Edit**
Add new images or remove existing ones using the same upload methods (device, library, or URL)
Click **Save** to retrain the model with the updated images
Editing a model updates the existing model. It does not create a new one. All future generations using `@modelname` will use the updated version.
## Delete a model
To remove a model you no longer need:
1. Go to **AI models**
2. Hover over the model you want to delete
3. Click the **…** (three dots) menu
4. Select **Delete**
Deleting a model is permanent and cannot be undone. Any prompts referencing the deleted model will no longer work.
## Use models in prompts
Reference the model in any prompt by typing `@modelname`. Example: `@ada wearing a business suit in an office`.
**Multi-product shots**: Combine multiple product or character models in a single image by tagging them with commas: `@product1, @product2, @product3` or `@character1, @character2`. Perfect for creating scenes with multiple trained products or characters together.
Use studios and style references alongside product and character models to keep style and context consistent.
You can mix one style model with product and/or character models in the same prompt for layered control. Only one style model is allowed per prompt, and a style model still cannot be combined with a separate style reference image (use one or the other).
## See also
* [Create consistent AI character models](/guides/ai-character-models)
* [Create professional AI product shots](/guides/ai-product-shots)
* [Master AI studios for production-grade visuals](/guides/ai-studios)