> ## Documentation Index
> Fetch the complete documentation index at: https://kive.ai/docs/llms.txt
> Use this file to discover all available pages before exploring further.
# Generate an image
> Create high-resolution images from text prompts using studios
The image generator turns short prompts into high‑quality images. Start with a studio for consistent lighting and composition. You'll only spend credits when you generate the final image.
## Steps
On the home page, click **Create an image** (or click **Create** in the top navigation bar and select **Image**) to open the image generator. On mobile, tap **Create** in the bottom navigation. You can also start from a **style reference** or a **studio**.
Keep your prompt short and clear. Focus on the main subject or scene you want to generate.
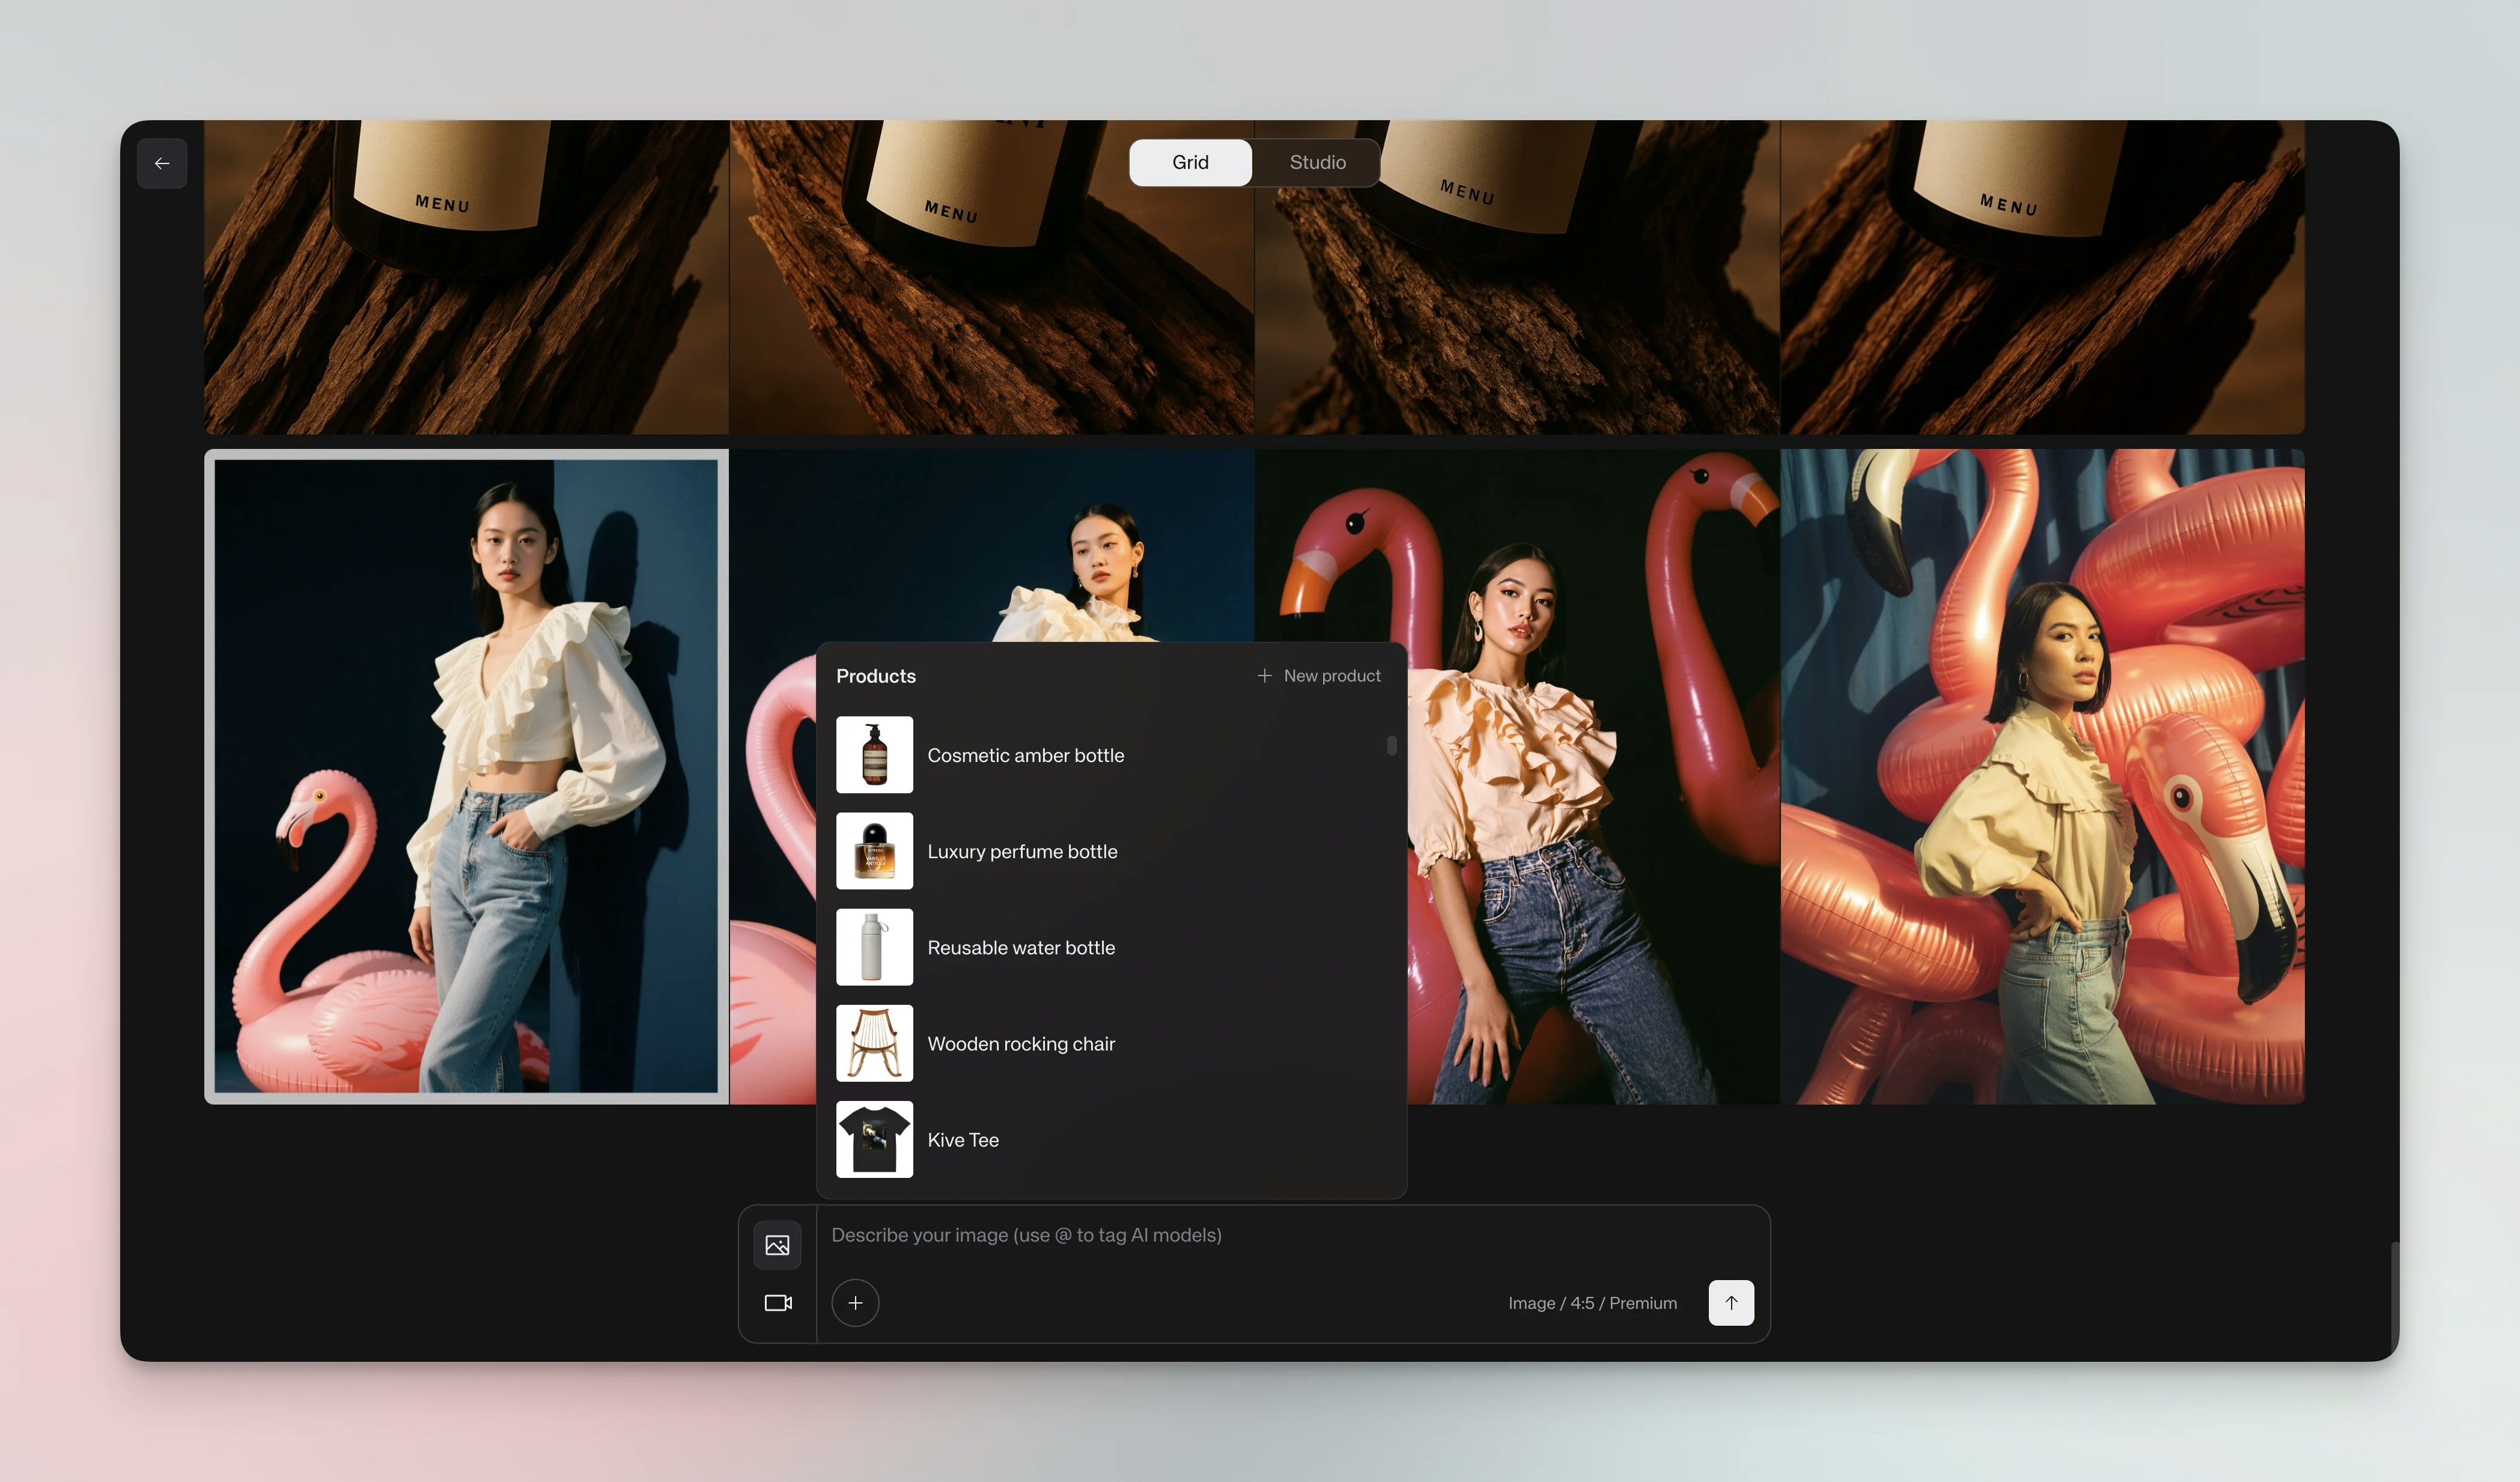
To include a specific product or subject, type its model name (for example, `@product1`) in your prompt.
 Pick a studio preset for easy prompting.
 The generation bar shows all settings in a single row below the prompt:
* **IMAGE / VIDEO** dropdown — switches between image and video generation (see [Generate a video](/creating-with-ai/generate-a-video))
* **STUDIO** dropdown — select a studio preset for consistent lighting and composition
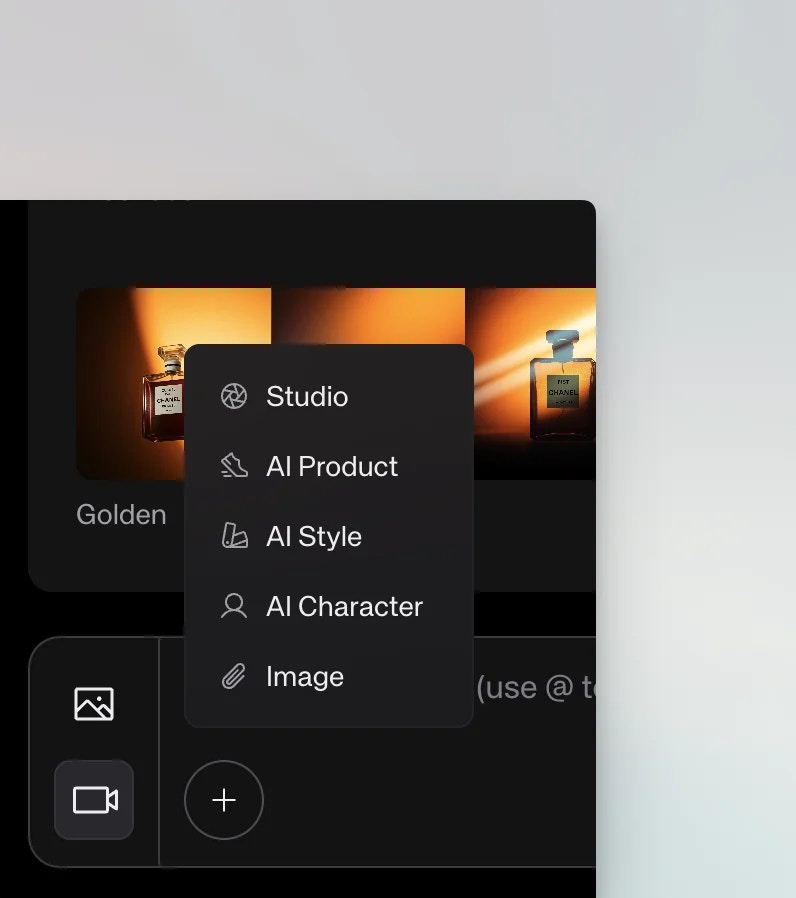
* **+** button — quick-add a **Product**, **Character**, or **Style** model, or attach an **Image** as a reference
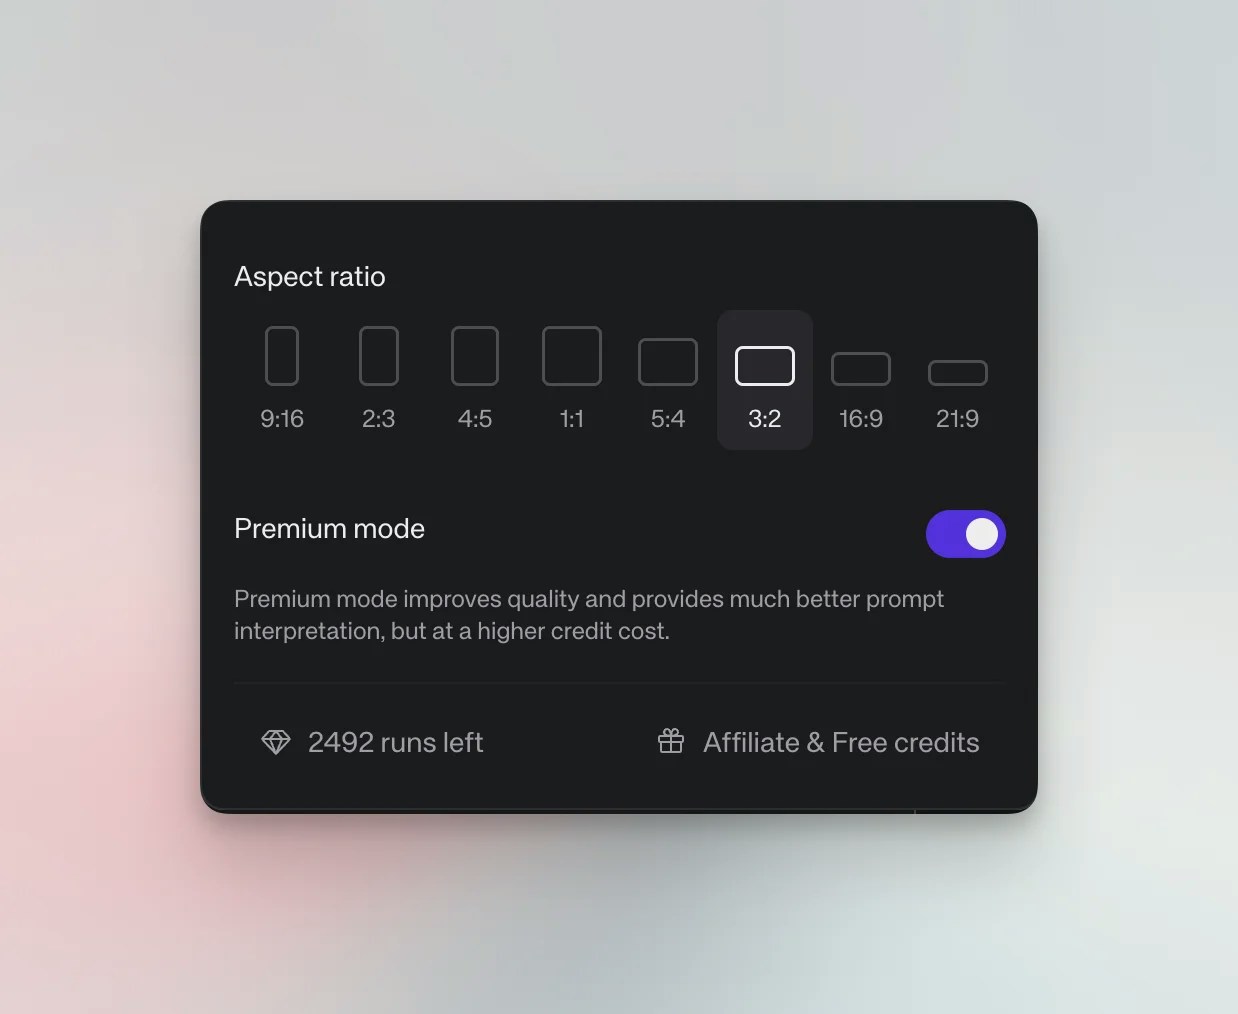
* **Aspect ratio** — click to choose from 9:16, 2:3, 3:4, 4:5, 1:1, 5:4, 4:3, 3:2, 16:9, or 21:9
* **Versions** — choose how many variations to generate: 1, 2, or 4 images
* **Quality** — balance credits and output:
* **Default** — fast and affordable, ideal for testing ideas
* **Premium** — the go-to for most professional work
* **Max** — unrivaled power for flagship content
The credit cost updates in real time below the bar as you change settings.
The generation bar shows all settings in a single row below the prompt:
* **IMAGE / VIDEO** dropdown — switches between image and video generation (see [Generate a video](/creating-with-ai/generate-a-video))
* **STUDIO** dropdown — select a studio preset for consistent lighting and composition
* **+** button — quick-add a **Product**, **Character**, or **Style** model, or attach an **Image** as a reference
* **Aspect ratio** — click to choose from 9:16, 2:3, 3:4, 4:5, 1:1, 5:4, 4:3, 3:2, 16:9, or 21:9
* **Versions** — choose how many variations to generate: 1, 2, or 4 images
* **Quality** — balance credits and output:
* **Default** — fast and affordable, ideal for testing ideas
* **Premium** — the go-to for most professional work
* **Max** — unrivaled power for flagship content
The credit cost updates in real time below the bar as you change settings.
 Click the arrow button (↑) to render the final image. Save favorites to boards or download to your device.
Generated images first appear in your personal drafts feed, visible only to you. To share with workspace members, save the image to your library or a board by clicking the **Save** button on the image.
## Options
Style reference: Right‑click an image and choose **Use image style** to borrow its look, or click **Use image style** in the item detail view.
Models: Type `@modelname` to reference trained subjects. For multi-product shots, combine multiple product models with commas: `@product1, @product2`.
Reuse prompts: Open a generated image and click **Use prompt** to copy the prompt back into the text bar.
Download: From an image, use the download option to save it to your device.
## Credits
Final generations consume credits whether or not you save them to a board. If a generation fails to produce any output (for example due to a technical error or moderation block), your credits are automatically refunded. Generations that complete but don't meet your expectations are not refunded — this is expected with AI, where some variation is normal.
## Tips
Tip: Start with studios for best results — they handle lighting and composition so you can focus on the subject.
Tip: Keep prompts short and clear; avoid extra details that fight the studio preset.
Tip: Save successful prompts and models to boards so you can reuse them later.
Tip: Kive understands prompts in multiple languages including English, Spanish, French, Portuguese, German, and more, though we recommend English for best results.
## Delete images
**Saved images:** Delete from your Library or Boards by selecting the image and clicking **Delete**.
**Unsaved generations (drafts):** You can delete a row of generations by clicking the trash icon on the right side of the row. Individual unsaved generations cannot currently be deleted from the drafts feed.
Some deletion options may not be available on mobile.
## Troubleshooting
Out of credits: Check **Settings → Subscription** or upgrade.
Low quality: Try using a studio preset or add a style reference. Check prompt clarity and ensure your prompt aligns with the studio style.
Multiple poses appearing as a grid: Specifying multiple poses in your prompt (e.g., "model standing, model sitting") may result in a grid layout. Run separate generations for each pose instead.
## See also
* [Generate a video](/creating-with-ai/generate-a-video)
* [Train a custom model](/creating-with-ai/train-a-custom-model)
* [Editing tools overview & credit costs](/editing-tools/editing-tools-overview)
* [Studios](/guides/ai-studios)
Click the arrow button (↑) to render the final image. Save favorites to boards or download to your device.
Generated images first appear in your personal drafts feed, visible only to you. To share with workspace members, save the image to your library or a board by clicking the **Save** button on the image.
## Options
Style reference: Right‑click an image and choose **Use image style** to borrow its look, or click **Use image style** in the item detail view.
Models: Type `@modelname` to reference trained subjects. For multi-product shots, combine multiple product models with commas: `@product1, @product2`.
Reuse prompts: Open a generated image and click **Use prompt** to copy the prompt back into the text bar.
Download: From an image, use the download option to save it to your device.
## Credits
Final generations consume credits whether or not you save them to a board. If a generation fails to produce any output (for example due to a technical error or moderation block), your credits are automatically refunded. Generations that complete but don't meet your expectations are not refunded — this is expected with AI, where some variation is normal.
## Tips
Tip: Start with studios for best results — they handle lighting and composition so you can focus on the subject.
Tip: Keep prompts short and clear; avoid extra details that fight the studio preset.
Tip: Save successful prompts and models to boards so you can reuse them later.
Tip: Kive understands prompts in multiple languages including English, Spanish, French, Portuguese, German, and more, though we recommend English for best results.
## Delete images
**Saved images:** Delete from your Library or Boards by selecting the image and clicking **Delete**.
**Unsaved generations (drafts):** You can delete a row of generations by clicking the trash icon on the right side of the row. Individual unsaved generations cannot currently be deleted from the drafts feed.
Some deletion options may not be available on mobile.
## Troubleshooting
Out of credits: Check **Settings → Subscription** or upgrade.
Low quality: Try using a studio preset or add a style reference. Check prompt clarity and ensure your prompt aligns with the studio style.
Multiple poses appearing as a grid: Specifying multiple poses in your prompt (e.g., "model standing, model sitting") may result in a grid layout. Run separate generations for each pose instead.
## See also
* [Generate a video](/creating-with-ai/generate-a-video)
* [Train a custom model](/creating-with-ai/train-a-custom-model)
* [Editing tools overview & credit costs](/editing-tools/editing-tools-overview)
* [Studios](/guides/ai-studios)