> ## Documentation Index
> Fetch the complete documentation index at: https://kive.ai/docs/llms.txt
> Use this file to discover all available pages before exploring further.
# Chat mode
> Iterate on any generation through conversation — describe edits, chain tasks, and generate video
Chat mode lets you iterate on any generated image through conversation. Describe edits in plain language, chain multiple steps together, or run tasks in the background while you work on something else. It's the fastest way to go from a first generation to a polished final result.
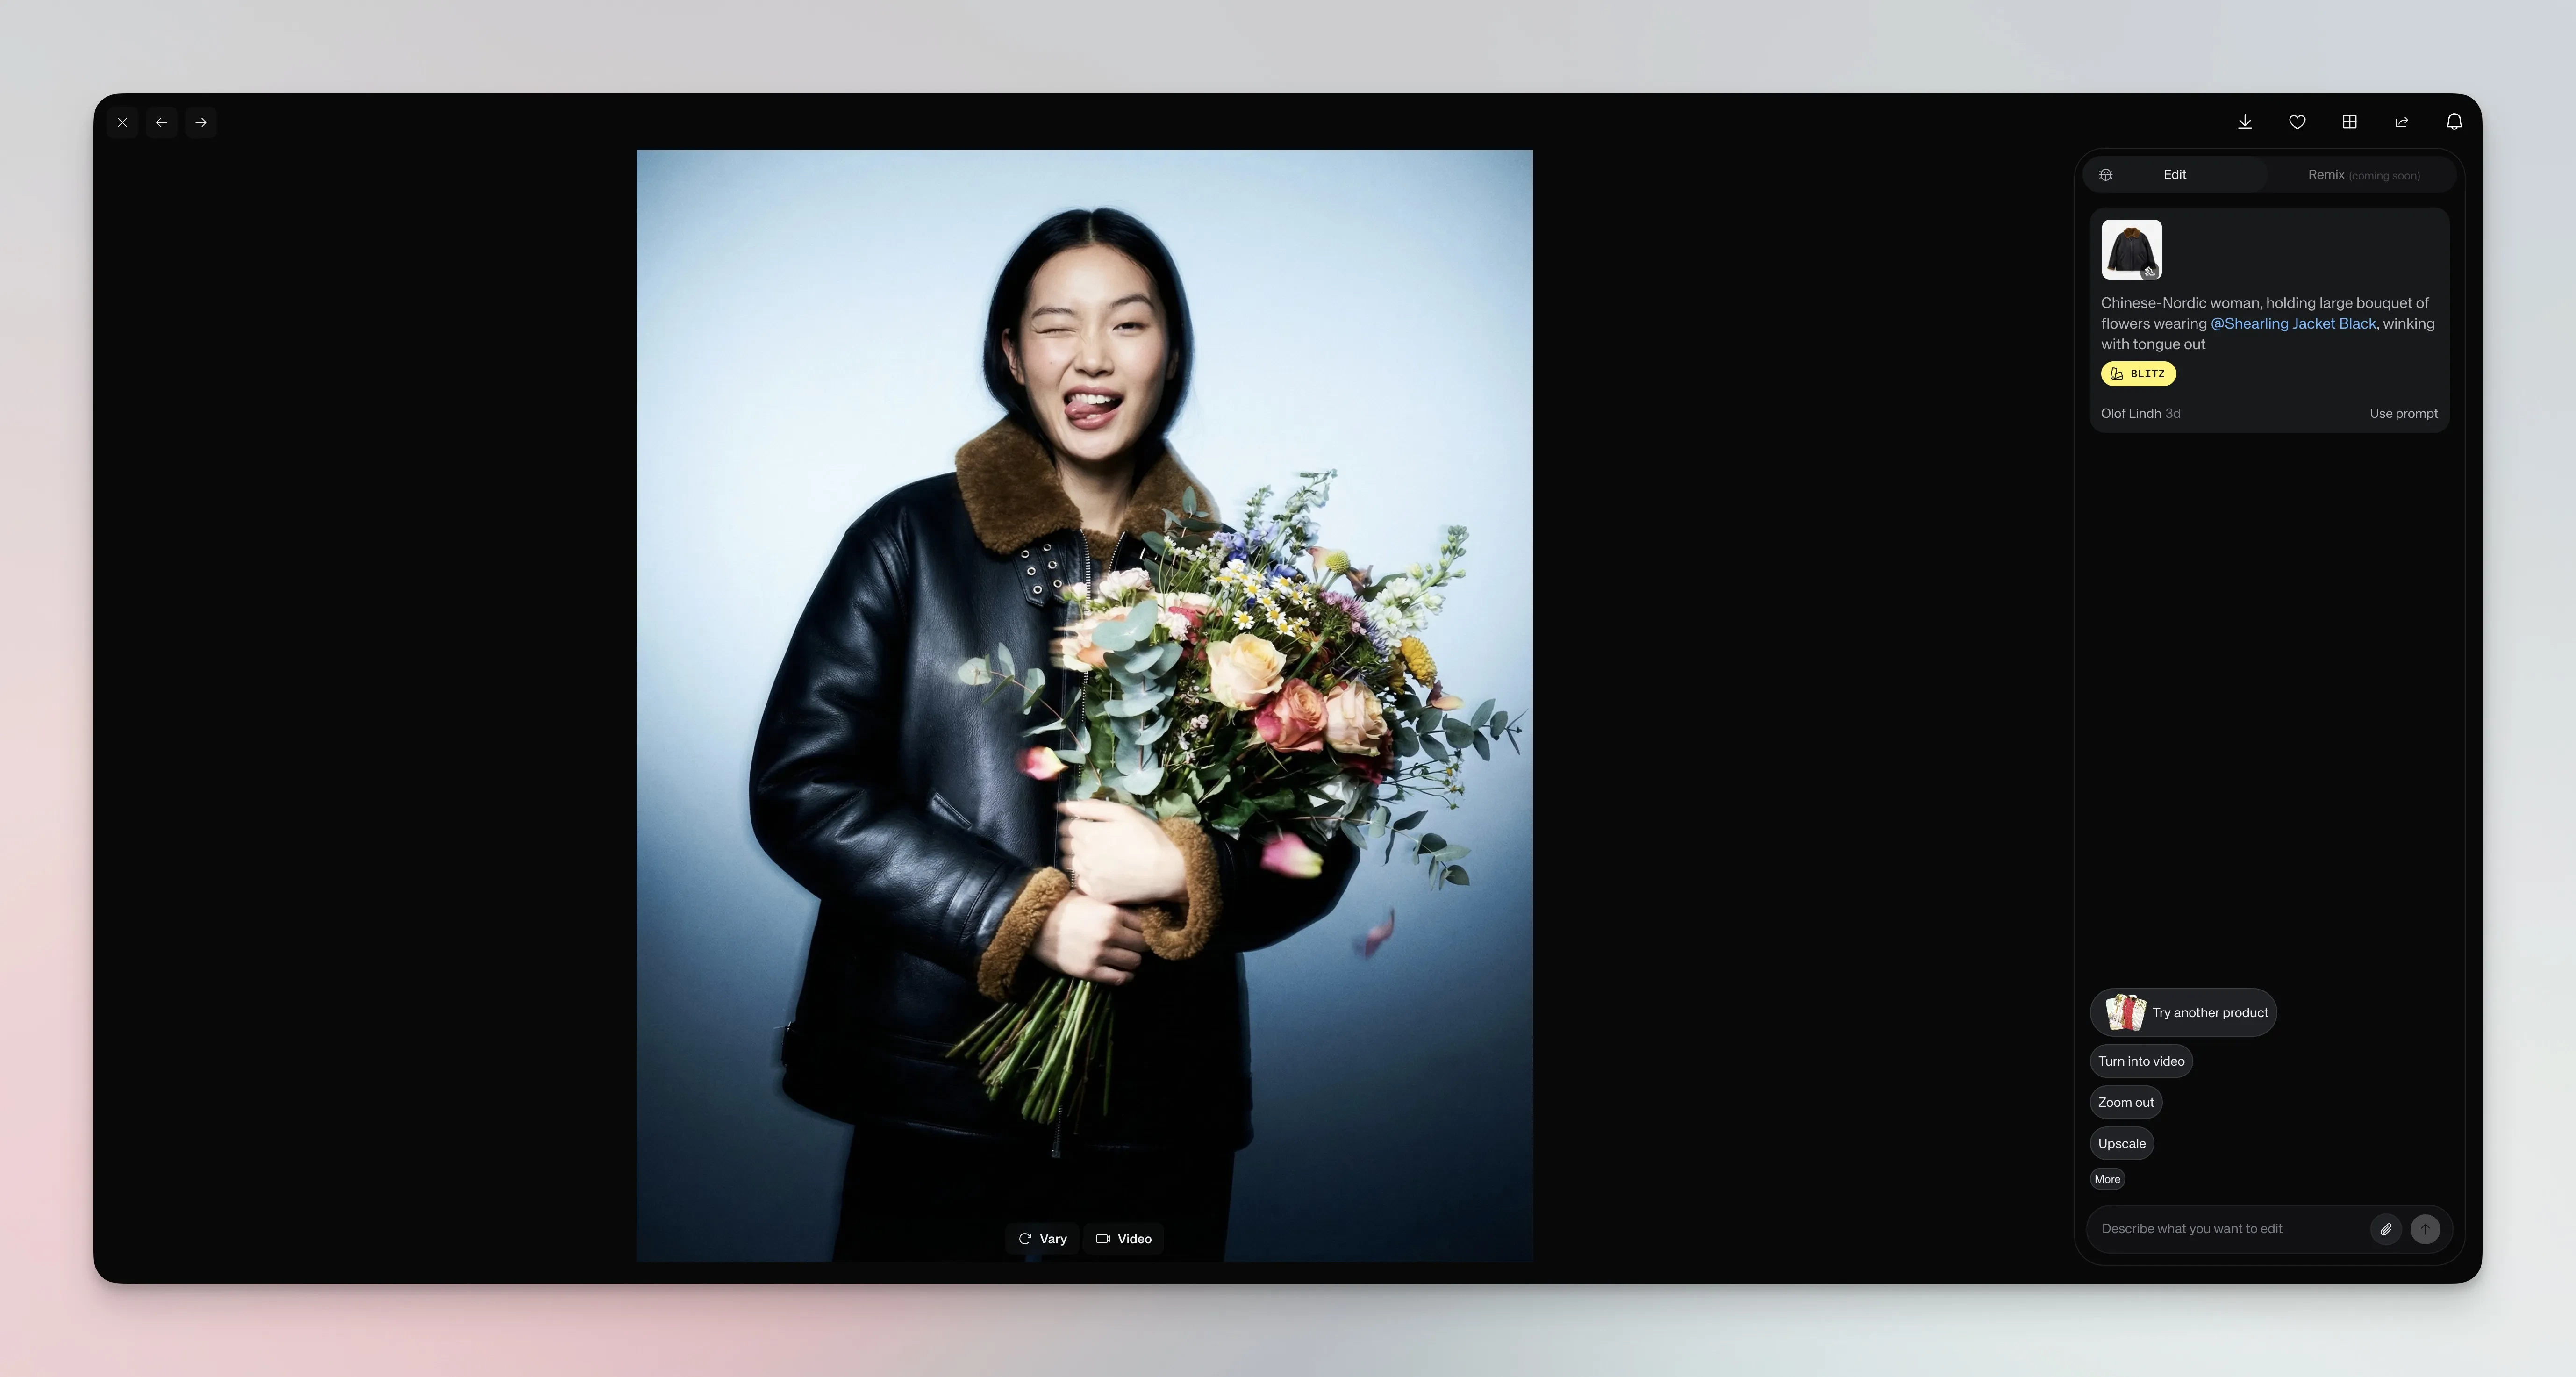
## Where to find it
Open any generated image in the **Create** section. Chat mode appears as the **Edit** panel on the right side of the screen. You'll see the original prompt, quick actions like **Turn into video** and **Zoom out**, and a text field where you can describe what you want to change.
 ## Describe what you want
Write in natural language. Chat mode understands requests like "make it a close up", "remove the object in the corner", or "add dramatic lighting". The agent thinks through your request, then generates a new version. Each edit costs credits and builds on the conversation history, so you can refine results step by step.
## Describe what you want
Write in natural language. Chat mode understands requests like "make it a close up", "remove the object in the corner", or "add dramatic lighting". The agent thinks through your request, then generates a new version. Each edit costs credits and builds on the conversation history, so you can refine results step by step.
 You can also click the paperclip icon to attach reference images — useful for style references, start and end frames, or any visual context you want the agent to consider.
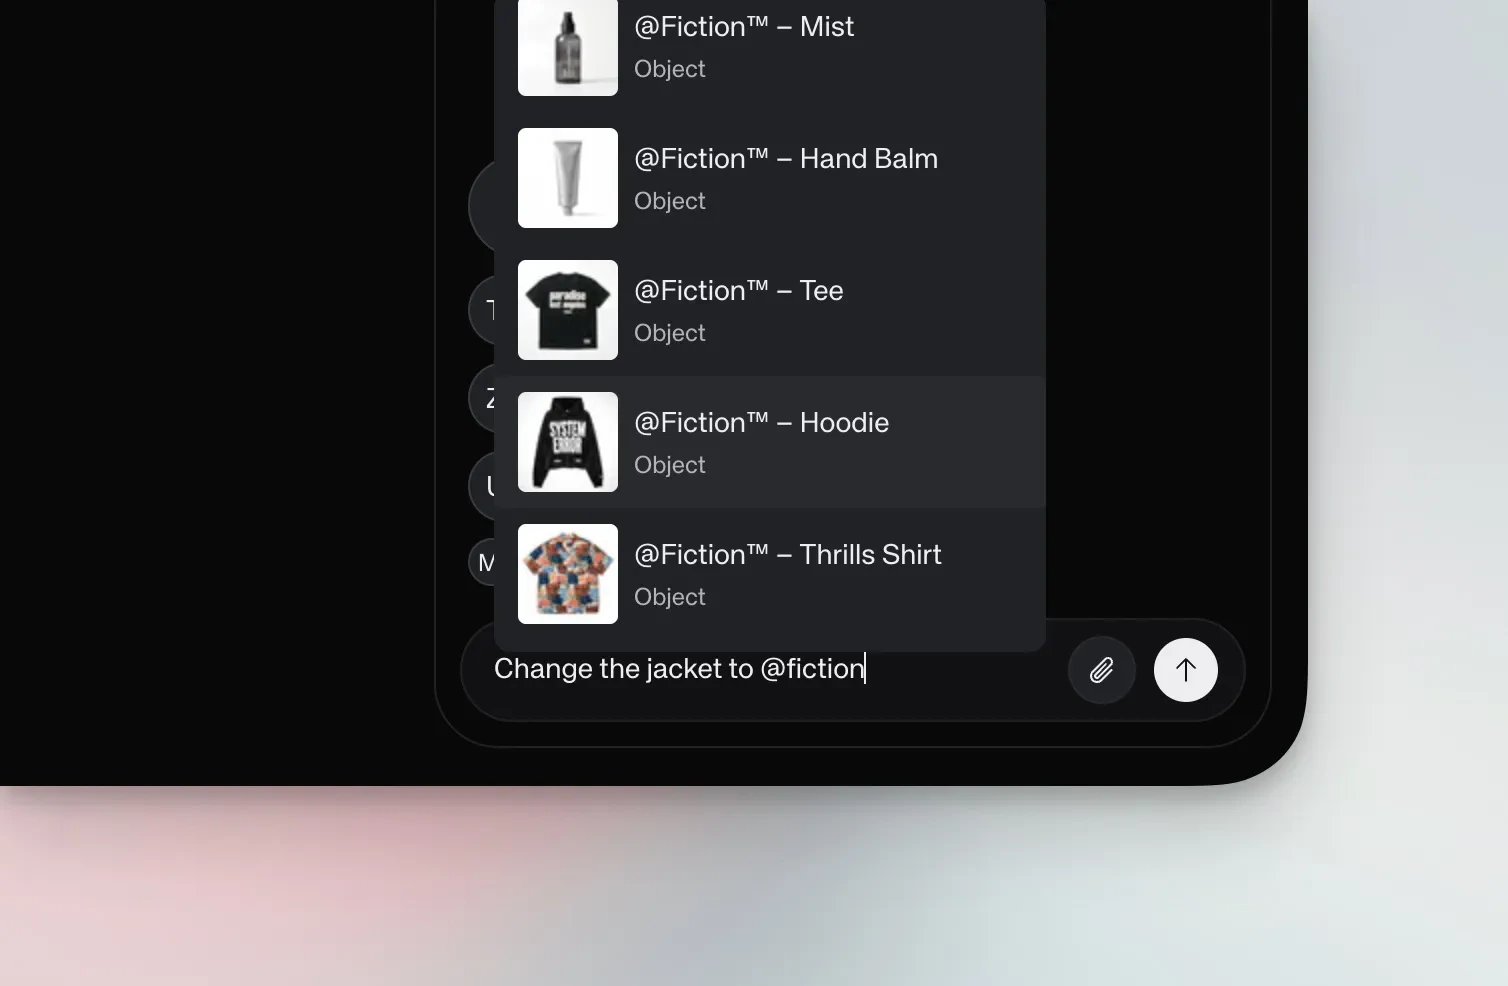
## Reference custom models
Type `@` in the text field to mention any custom model from your workspace. The model gets applied to your request, so you can swap products, change outfits, or add accessories in a single message.
You can also click the paperclip icon to attach reference images — useful for style references, start and end frames, or any visual context you want the agent to consider.
## Reference custom models
Type `@` in the text field to mention any custom model from your workspace. The model gets applied to your request, so you can swap products, change outfits, or add accessories in a single message.
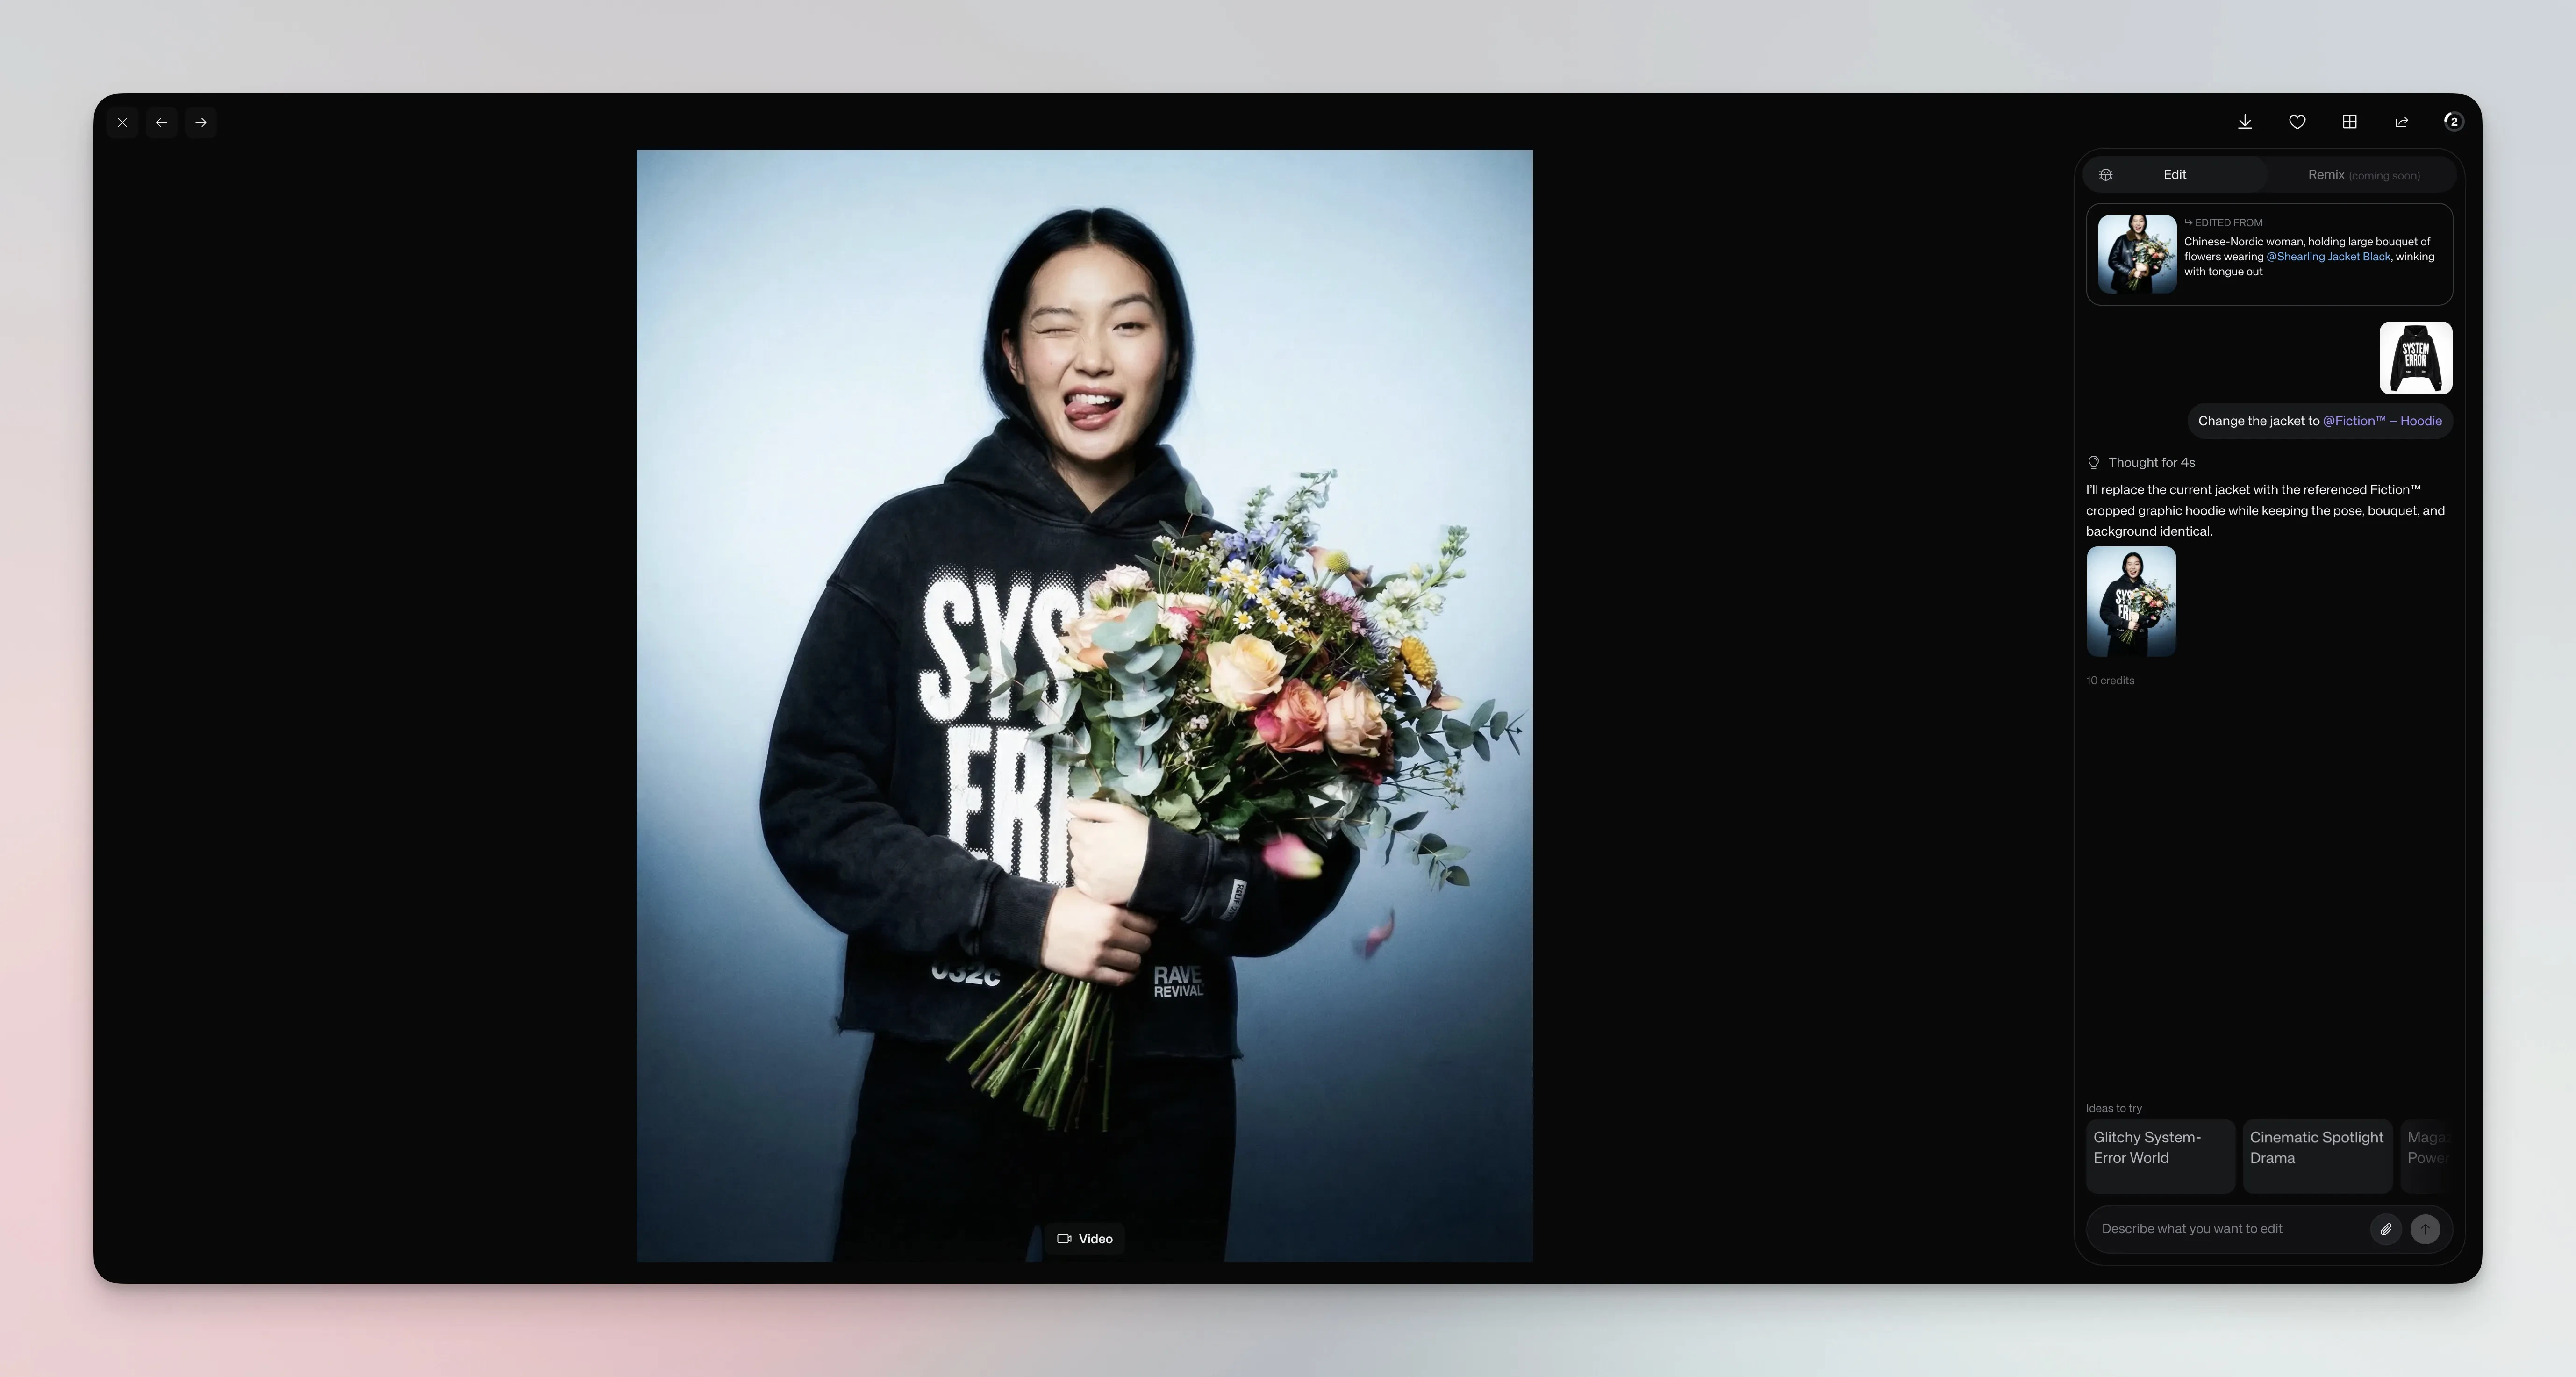
 For example, you might type "Change the jacket to @Fiction -- Hoodie" and Chat mode will replace the jacket with that specific product while keeping everything else intact. This works for any model type — products, characters, or styles.
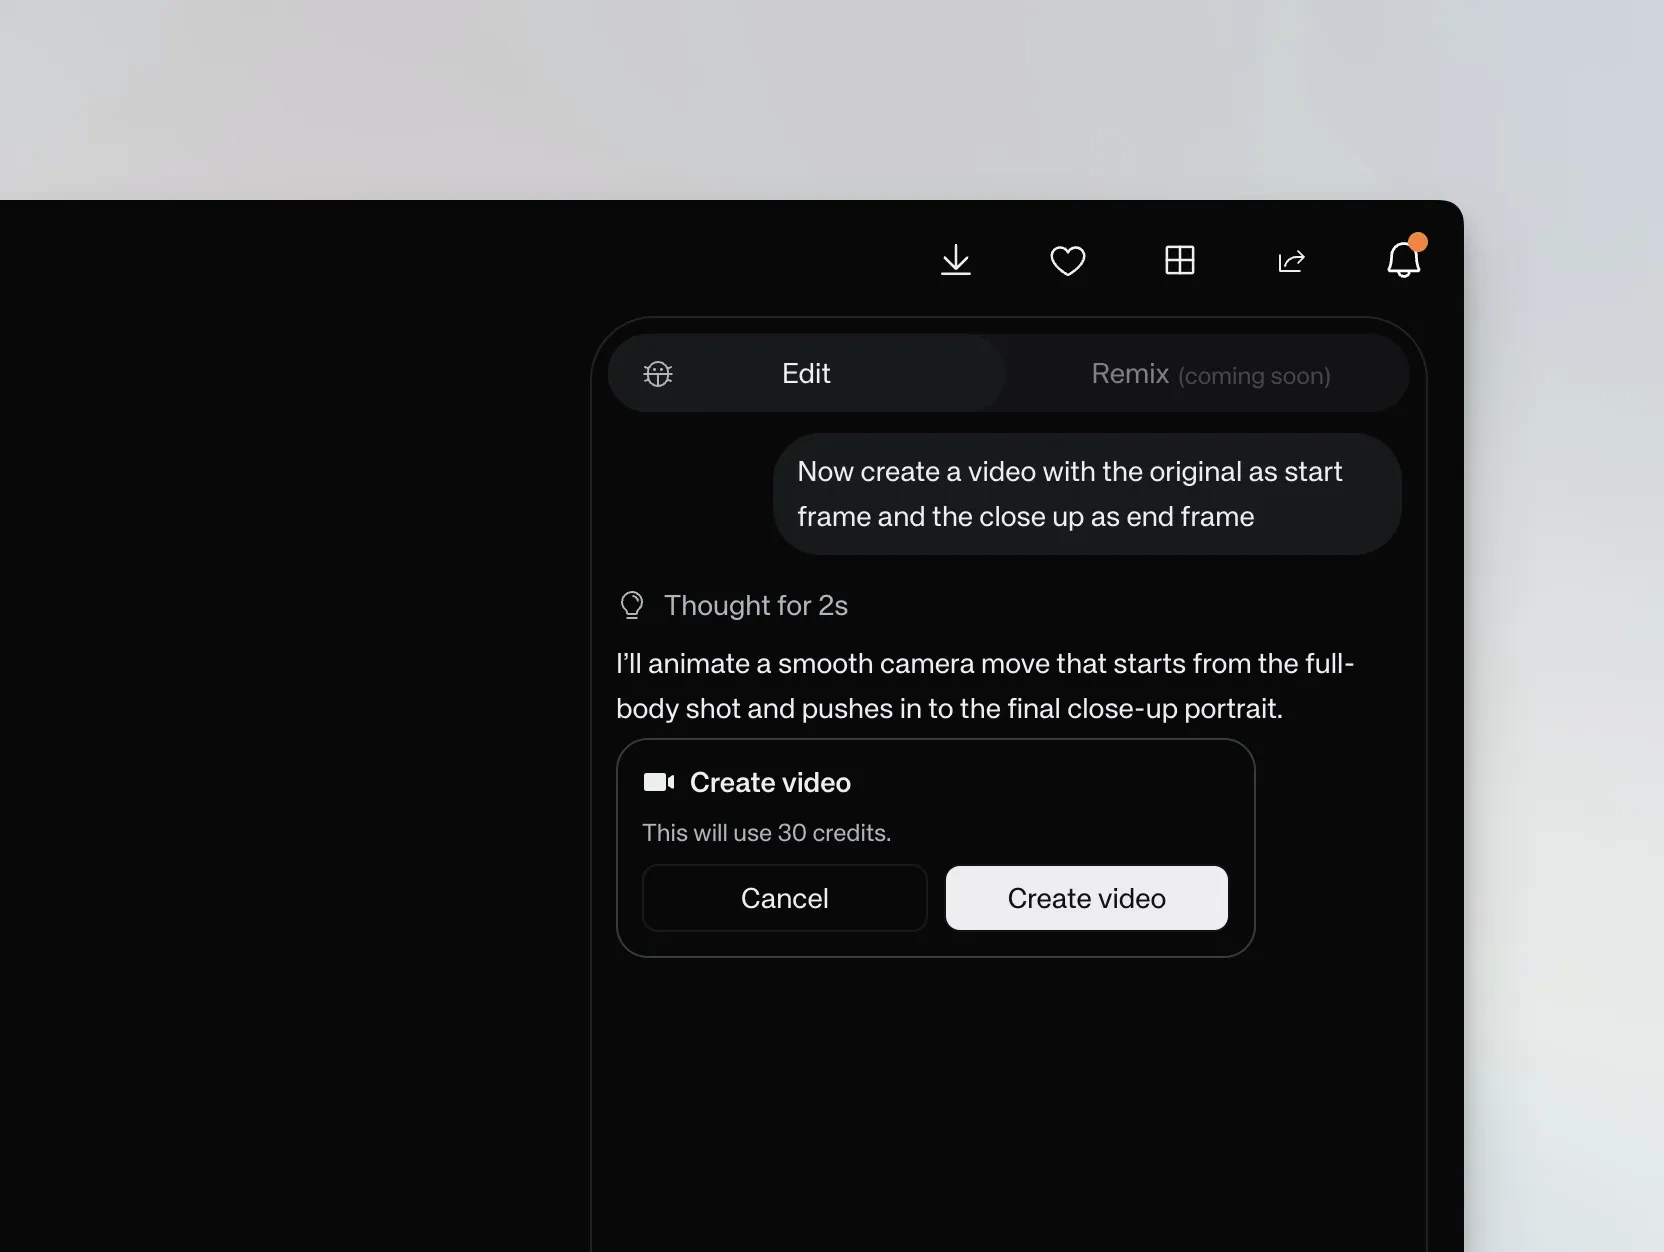
## Generate video
Turn any image into video by describing the motion you want. Ask for camera movements like "slowly push in on the product", subject animation like "make this person walk around", or combine both. Chat mode will show a confirmation step with the credit cost before generating.
For example, you might type "Change the jacket to @Fiction -- Hoodie" and Chat mode will replace the jacket with that specific product while keeping everything else intact. This works for any model type — products, characters, or styles.
## Generate video
Turn any image into video by describing the motion you want. Ask for camera movements like "slowly push in on the product", subject animation like "make this person walk around", or combine both. Chat mode will show a confirmation step with the credit cost before generating.
 Common motion prompts include orbit shots ("do a 360 around it"), camera pushes ("push in with a cinematic vibe"), and subject movement ("make them take a spin while the camera pulls back").
## Chain tasks and run in the background
You can ask the agent to run a sequence of steps in a single conversation. Generate different angles from your shot, then create videos between those angles — all without leaving the chat.
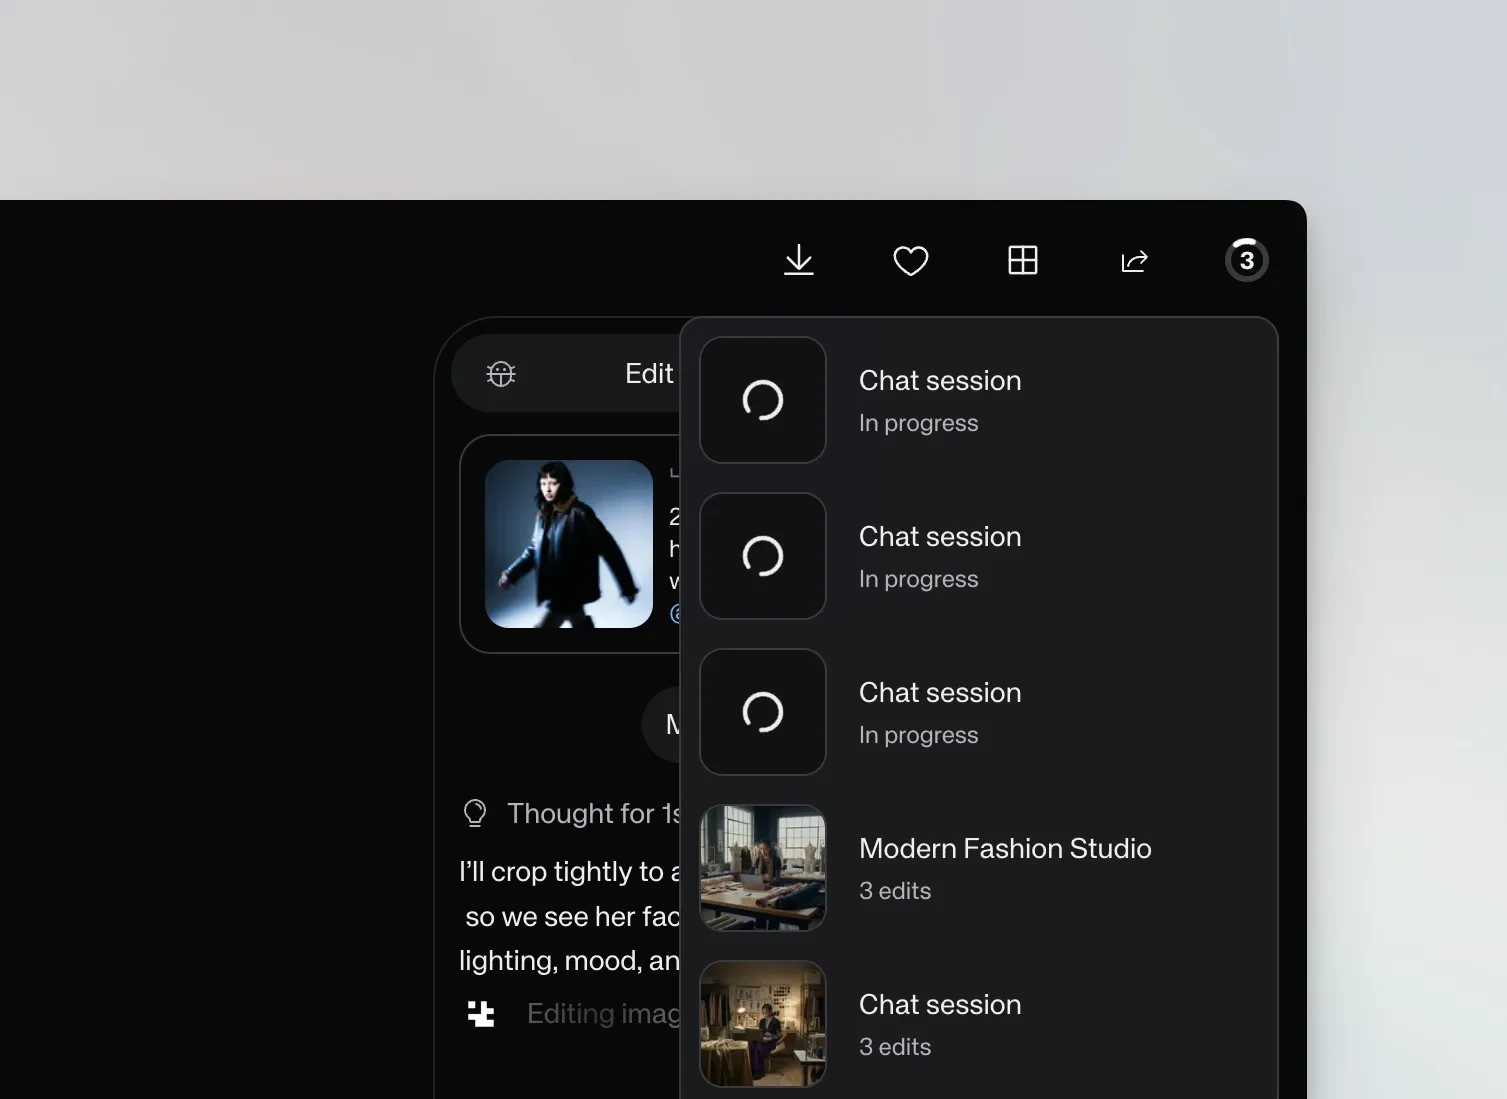
When you start a task that takes time, you don't need to wait. Open a different image or start a new conversation, and your previous tasks keep running in the background. The notification badge shows how many sessions are active.
Common motion prompts include orbit shots ("do a 360 around it"), camera pushes ("push in with a cinematic vibe"), and subject movement ("make them take a spin while the camera pulls back").
## Chain tasks and run in the background
You can ask the agent to run a sequence of steps in a single conversation. Generate different angles from your shot, then create videos between those angles — all without leaving the chat.
When you start a task that takes time, you don't need to wait. Open a different image or start a new conversation, and your previous tasks keep running in the background. The notification badge shows how many sessions are active.
 ## High-fidelity video with start and end frames
When you need precise control — especially for products with text, logos, or fine details — you can define both the start and end frames to avoid morphing artifacts.
**Generate the end frame first.** Ask Chat mode to create what the final frame should look like, then request a video transitioning between the two. For example: "First generate an image where the camera has moved closer and flowers have appeared on the sides. Then generate a video transitioning from the original to that new image."
## High-fidelity video with start and end frames
When you need precise control — especially for products with text, logos, or fine details — you can define both the start and end frames to avoid morphing artifacts.
**Generate the end frame first.** Ask Chat mode to create what the final frame should look like, then request a video transitioning between the two. For example: "First generate an image where the camera has moved closer and flowers have appeared on the sides. Then generate a video transitioning from the original to that new image."
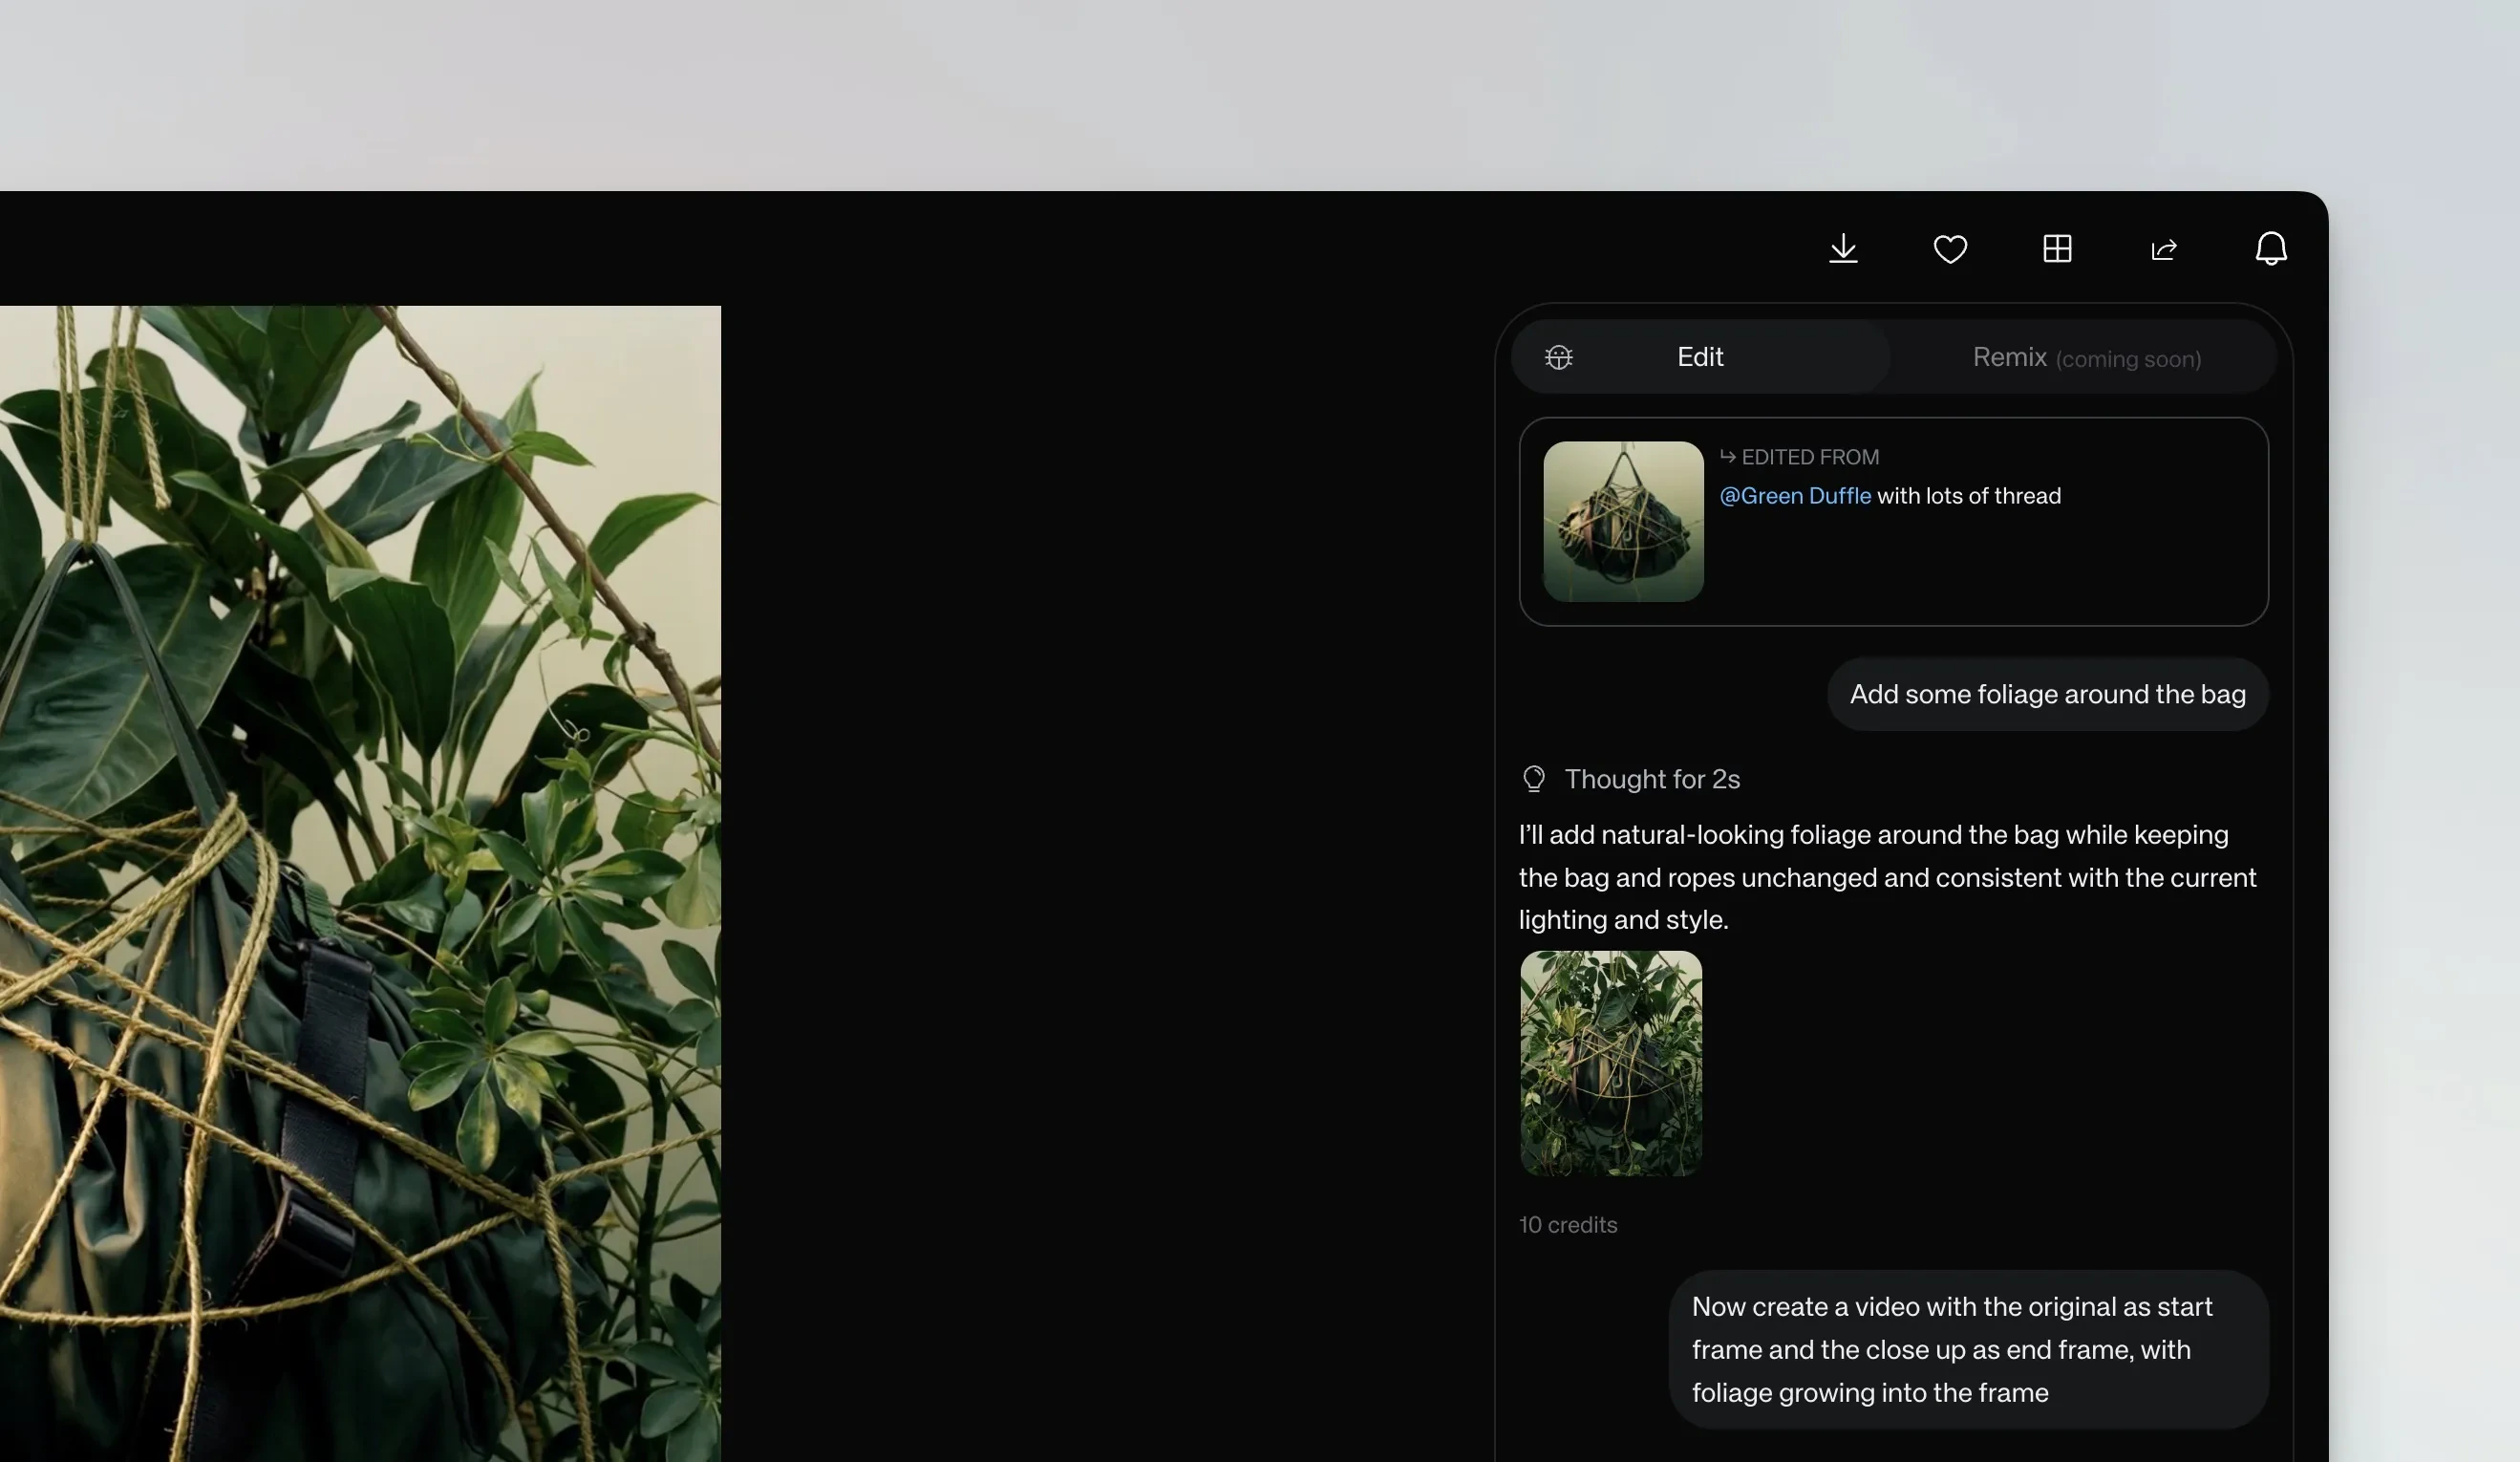 Here's what the resulting video looks like — the camera pushes in smoothly while foliage grows into the frame, transitioning from the original to the generated end frame:
**Provide both frames.** You can also attach two images and specify how to use them. Try "Use this as start and end frames — create a video transitioning between them" or "Use this image as start and end frame and do a 360 orbit around it." The second approach creates a perfect loop since the video returns to the exact starting frame.
This technique is especially useful for product shots with text or logos. By controlling the end frame, you minimize morphing issues on fine details.
## Limitations
Chat mode is available for images created in the **Create** section. Complex multi-step tasks may take longer to process, and some edits work better with higher-quality source images. Each edit in the conversation costs credits — check your balance in **Settings**.
## See also
* [Generate an image](/creating-with-ai/generate-an-image)
* [Generate a video](/creating-with-ai/generate-a-video)
* [Train a custom model](/creating-with-ai/train-a-custom-model)
Here's what the resulting video looks like — the camera pushes in smoothly while foliage grows into the frame, transitioning from the original to the generated end frame:
**Provide both frames.** You can also attach two images and specify how to use them. Try "Use this as start and end frames — create a video transitioning between them" or "Use this image as start and end frame and do a 360 orbit around it." The second approach creates a perfect loop since the video returns to the exact starting frame.
This technique is especially useful for product shots with text or logos. By controlling the end frame, you minimize morphing issues on fine details.
## Limitations
Chat mode is available for images created in the **Create** section. Complex multi-step tasks may take longer to process, and some edits work better with higher-quality source images. Each edit in the conversation costs credits — check your balance in **Settings**.
## See also
* [Generate an image](/creating-with-ai/generate-an-image)
* [Generate a video](/creating-with-ai/generate-a-video)
* [Train a custom model](/creating-with-ai/train-a-custom-model)